Organise and digitise your family photos so they never get lost
I’ve been a professional photographer since the 90s, and if you’ve read my article on the best ways to backup photos you’ll know I take backing things up seriously. But there’s one category of photo that worries me even more than my own back catalogue: family photos. Decades of prints, negatives and slides that exist as a single copy, slowly fading away in a box in someone’s loft, with no backup of any kind.
This article will take you through the whole process on how to organise and digitise your family photos. Sorting what you’ve got, digitising it properly, organising the files so you can actually find things again, and then the bit most guides skip entirely: where you should actually keep everything afterwards, so it’s protected, easy to share with family, and private from everyone else.
Sort through everything first
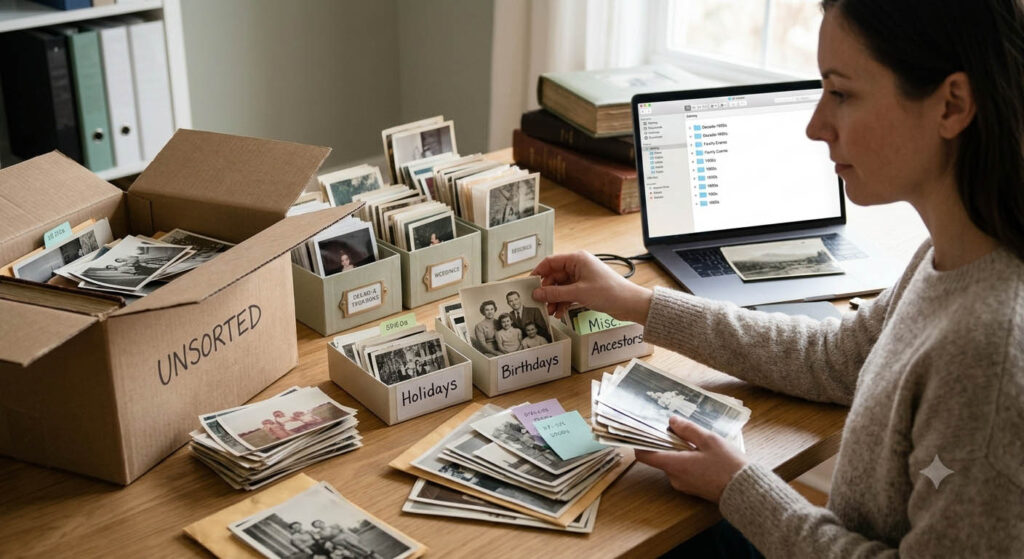
Before you scan a single print, get it all in one place. Albums, loose prints, negatives, slides, even the ones still stuck in frames.
Seeing the full scope of the job in one go is far less daunting than discovering “just one more box” every few weeks.
A few things worth doing at this stage:
- Sort roughly by decade or by side of the family first. You don’t need to be precise, just get things into some kind of order to work through.
- Get relatives involved while you can. Whoever remembers the names and dates behind old photos is a resource you won’t have forever. An afternoon with a parent or grandparent going through prints can save you from ending up with hundreds of beautifully scanned photos of people nobody can identify.
- Don’t bin anything yet. It’s tempting to toss duplicates or the “boring” shots, but that decision is much easier to make once everything is digital and you can actually see what you’ve got.
- Handle old prints carefully. Clean, dry hands, a soft brush or microfiber cloth for dust, and never a liquid cleaner, which can damage the emulsion.
What's the best way to digitise your family photos?
There isn’t one single right answer, it depends on the photo, and most people end up using a mix of these.
1: Scanning apps
A dedicated photo-scanning app on your phone, rather than just photographing a photo, will crop, straighten and correct glare far better than a plain camera shot. It’s the fastest way through a big pile of prints, though quality is noticeably lower than a proper scan, so I’d keep this for the photos that aren’t especially precious.
One option is: Google PhotoScan,
2: A flatbed scanner
This is the best DIY option for quality, and the one I’d use for anything that really matters. It’s slower, one photo at a time, but it captures far more detail and handles poor lighting or high contrast originals much better than a phone camera ever will.
Scan at 300 DPI as a minimum, and 600 DPI if you think you might ever want to enlarge or restore the image later. Save an uncompressed TIFF as your master copy, then export smaller JPEGs for sharing. Slides and negatives need a higher resolution than prints to capture the same level of detail.
Get a dedicated scanner rather than a printer and scanner bundle for better results and the ability to scan negatives or slides. I have always found the best flatbed scanner to be Epson.
3: A professional scanning service
If you’re dealing with thousands of photos, or fragile slides, negatives and old film reels, sending them to a professional scanning service can be worth the expense. Services like ScanCafe, ScanMyPhotos and Capture will scan, and often lightly restore, everything in bulk. It’s the fastest way through a large collection, though you are trusting irreplaceable originals to the post, so check their insurance and tracking before sending anything.
My own approach would be a scanning app for the bulk of a collection, a flatbed scanner for the photos that matter most, and a professional service only if the sheer volume makes doing it yourself unrealistic.
Organising the digital files
Digitising without organising just moves the shoebox problem onto your hard drive. A little structure now saves hours of searching later.
- Use a consistent folder and file naming system, by decade or family branch, with files named something like 1985-06_Summer-Holiday_Names. The system matters less than being consistent with it.
- Add names, dates and places while you still can. It’s far easier to capture this now, while people who remember it are still around, than to try and reconstruct it later.
- Remove genuine duplicates, but don’t be too aggressive about it. Near-identical shots from the same roll sometimes capture a slightly different, equally worthwhile moment.
Backing up photos properly
Everything in my guide to backing up photos applies here too, especially the golden rule: three copies, on two different types of storage, with one of them off-site.
A hard drive can fail, a laptop can be stolen, and a house can flood or burn. What’s very unlikely is all of your copies failing at once if they’re not all sitting in the same place. This is also exactly where the choice between “just storage” and “a proper photo website” comes in, because your off-site copy can do two jobs at once: protecting your files, and giving you somewhere to actually enjoy and share them.
Cloud storage or a photo website? They’re not the same thing
This is the bit that trips people up. Storage isn’t one job, it’s really two, and most services are only built to do one of them well.
Storage on its own
Services in this category are built primarily to back up and sync files: automatic backup the moment a photo is added, syncing across your own devices, and basic sharing via a link or a shared folder. What they’re not built for is presenting your photos as a browsable gallery, or letting a relative click through pictures without a login. That’s a different job entirely.
1: Idrive
This is the one I use myself, and have written about before. One account backs up unlimited computers and phones under a single plan, which is genuinely useful if there’s more than one device in the family that needs protecting. You can set a private encryption key when you sign up for true zero-knowledge privacy, just don’t lose it, as nobody, including Idrive, can recover your files without it. It also has a dedicated photo app, and Idrive Express, where they’ll ship you a physical drive so you don’t have to upload an entire archive over your home broadband.
2: Dropbox
One of the oldest cloud storage services and still one of the most reliable for syncing across your own devices. It stores photos at full resolution, and camera upload will back up your phone automatically. Its main limitation for a family archive is that there’s no small, budget-friendly plan, so you jump straight from a small free tier to a much bigger paid one, and password-protected sharing links are mostly reserved for business plans rather than personal ones.
A proper photo website
This is where a dedicated gallery site earns its keep. Instead of one link anyone can pass around, you get proper galleries, each with its own visibility: public, unlisted, password-protected or fully private.
1: Smugmug
I use Smugmug for my own photo galleries, and it’s the one I’d point most families towards for this particular job, because it’s actually built for photo storage and display rather than being a general website builder with galleries bolted on as an afterthought.
Every plan includes unlimited photo and video storage, kept at full resolution with no compression, which matters if you’ve scanned old photos at a high DPI and don’t want that detail thrown away. For a family archive, the feature that matters most is the privacy control: each gallery can be set to Public, Unlisted or Private, with password protection on top of that. So you could have one public gallery of old holiday photos anyone can browse, and another kept private for just a few relatives.
I’ve also written a full walkthrough on setting up galleries in Smugmug, plus a series of tutorial videos on YouTube, if you want to see it in action before committing to anything.
You can try it free for 14 days. If you decide to continue, my link gets you 15% off whichever plan you choose, no code needed.
2: Squarespace
Squarespace is a general-purpose website builder rather than a dedicated photo platform, and galleries are one strong feature among several others: blogging, contact forms, event pages, a full online store. The templates are polished, and the Asset Library makes it easy to bulk-upload and tag photos. You can password-protect individual pages, which covers most families’ privacy needs, though it’s a page-level control rather than Smugmug’s per-gallery visibility settings.
It’s the better choice if what you actually want is one complete family website, photos alongside stories, a blog, maybe a family newsletter, rather than a gallery tool with nothing else attached.
3: Strikingly
Strikingly is the simplest and fastest of the three to set up. You can have a basic one-page (or light multi-page) family site live within the hour, and the free tier is generous enough to try before paying anything. Pages can be password-protected for basic privacy, but it has far fewer photo-specific tools than Smugmug, no watermarking, and no gallery-level visibility settings, so I’d keep it for a simple family hub page rather than your main photo archive.
So which should you actually use?
If you only want a safe, private backup with no public gallery, Idrive or Dropbox will do the job on their own. If you want a proper, organised archive with real control over who sees what, Smugmug is the one I’d choose, and it’s the one I use myself. If you want one complete website that covers photos and everything else, go with Squarespace. And if you just want the simplest possible family page up this weekend, Strikingly will get you there.
Honestly, most families do best pairing two of these: a cloud service like Idrive as the private, full-resolution vault, and a gallery site like Smugmug as the curated front door you actually send people to. You don’t have to pick only one.
Keep it going
Digitising decades of photos has a finish line. A family archive doesn’t, it only stays useful if it keeps growing. Digitise new prints as you go, ask relatives to add names and stories while memories are still fresh, and check every so often that your backups and sharing links still work.
Don't leave it too late
I’ve seen what happens when people put this off. Prints fade, hard drives fail, and every year that passes makes the job a little bigger than it was before. Cameras and hard drives can be replaced. These photos can’t.