15% off smugmug plans
As an affiliate of Smugmug I receive a small commission if you purchase a package, but at no extra cost to you.
Save 15% off all new Smugmug packages. Simply click my affiliate link and signup for the free 14-day trial (no credit card needed) and the coupon is automatically applied. If after the trial you decide to purchase a plan, the discount is automatically applied:
Table of Contents
Why use Smugmug?
In this tutorial, the first of a series on how to build a Smugmug website, I show you the features and benefits of using Smugmug to build your own website so you can share or sell your photos, and how to setup photo galleries and upload your photos.
One of the advantages to using a dedicated website builder like Smugmug is that they make it so easy to upload, organise and setup your photo galleries. Depending on which plan you have, you can also easily make these photos for sale either as a whole or selectively.
Optimising your photos for viewing
One of the most important things you need to know about building a photography website is that when photos are displayed on a webpage, then need to be sized and optimised for fast page loading times.
If you upload a jpeg photo that is say 3mb, then when someone opens your webpage that 3mb photo needs to be downloaded to their device before the photo can be shown. Of course today download speeds are much faster than they used to be in the archaic times of dial-up connections. Still though, it can be time-consuming especially if there are server connection problems. Even with a superfast broadband connection, there are a thousand other places that can cause data transfer delays before it even gets to your ISP for download. Imagine then, if you have 10 photos in your gallery, that’s 30MB. It all adds up.
Photos displayed on a website also need to be physically resized accordingly. We all know about pixel count and resolution. Well, while for print we want the highest resolution possible, on a webpage it’s all very different. All photos on a webpage are displayed according the native resolution (PPI) of the screen on the user’s device. Therefore you need to think of pixel count not PPI or DPI. Small images may only need to be 500 pixels on the longest side, or 1000 for larger. It never needs to be larger than the average monitor. For example, my monitor on 1640 pixels on the horizontal, so if you upload a 3000 pixel photo to your webpage, then it will just be resized by the browser, or in most cases by the container in your website builder.
So, uploading full resolution photos that are 5000 pixels long, and 10mb in size will just cripple your webpage and make viewers either need to go off and make some tea while your gallery is downloading, or in reality they will click the back button and look elsewhere.
If you are building a website manually either with WordPress or some other website building platform, then you would need to ensure that you resize and optimise the file size for each photo you put up on your website. Very time-consuming!
No need to resize your photos with Smugmug
The great thing about using Smugmug is that you don’t need to bother doing any of this, because their dedicated system will do it all for you, quickly and efficiently. All you need to do is upload your photos and let the system take care of all the resizing and optimisation.
In fact, there are many advantages to uploading your full resolution photos. Firstly, there is no limit to the size and number of photos you can upload with any of the plans. This also means you get unlimited photo storage and the option to download any of your photos should you ever get a hard drive error and lose any. So it acts as a cloud backup too.
How to upload photos to your gallery
To upload your photos into your newly created gallery simply use the green upload button in the top left corner at anytime. If your gallery is not already selected then you will get a box prompting you to choose between uploading into a new gallery, existing gallery or to upload an entire folder. If you have already selected the gallery to which you want to upload then you will get a screen prompting you to either drag photos into the box, browse your computer to select photos or choose from other options below. You can also download the Smugmug App to make it all much easier. As well as from your PC, you can upload from other photo storage services such as: dropbox, Lightroom. Google Photos, Flickr or Amazon Drive
Gallery settings
Once you click create, a box will appear called “gallery settings”. Here you can set the gallery title, description, meta keywords, featured image and custom URL.
Choose a good title that will match with what people would be searching for on search engines. For example this gallery will contain photos of Old Harry Rocks in Dorset, and they are for sale as prints. So I chose the title: Photos of Old Harry Rocks in Dorset – buy photos on canvas, framed and more.
Same with the description. Write a good description with relevant keywords for good SEO. Here I wrote: Here you can view a gallery of my best photos of Old Harry Rocks. Old Harry Rocks are a distinctive feature and signify the start of the Jurassic Coast in Dorset. Jutting out at the southern end of Studland Bay at a place called Handfast Point, these amazing chalk cliffs and pinnacles make great photography subjects. Old Harry Rocks are best photographed at sunrise. Due to their orientation, the sun sets over the land, whereas the sun rises out at sea. Getting there is easy and involves a short 20-minute walk along the cliffs. You can also carry on walking, as this is part of the South West Coastal Path.
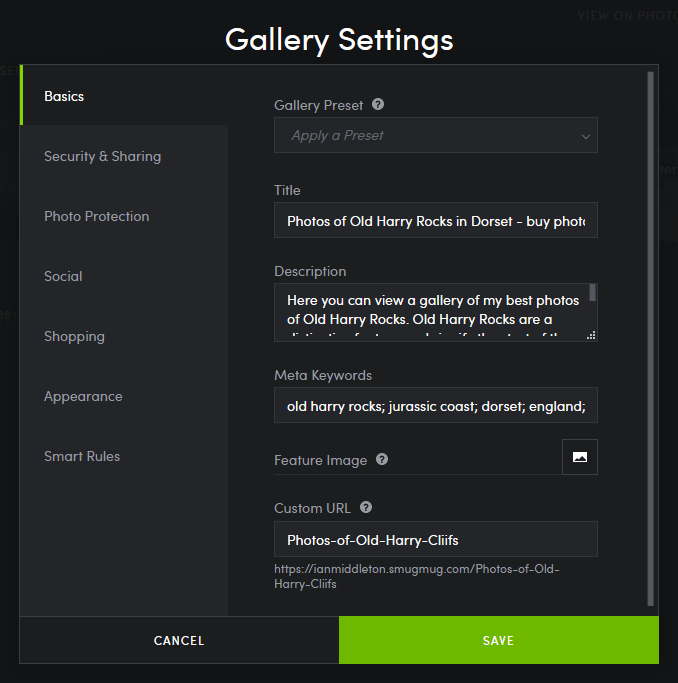
Meta keywords: Again, write as many relevant keywords as possible here to maximise your chances of being found on search engines and also within the Smugmug photo sharing community.
Featured image: The featured image can be set once you have uploaded photos to the gallery. You can then choose one to be featured on the header of the gallery page.
Custom URL: This is set automatically at first and is a copy of your title. However, if your title is too long then you will get a red error. All you need to do though, is shorten the URL NOT the title.
Preset: The preset menu at the top allows you to choose from settings you have already saved as a preset. Go to account settings for more info.
Gallery security settings
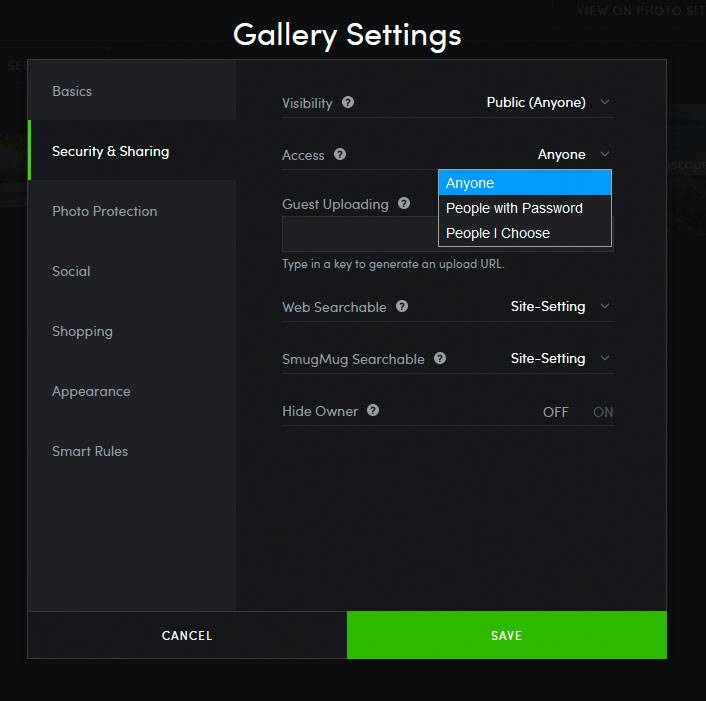
The screenshots here give you an example of the settings you can apply to your galleries.
Security and Sharing
Visibility: Here you can choose who can view your gallery.
Public: In most cases of course you would want to make it public so that anyone viewing your website can see it.
Unlisted: This option will enable anyone with a link (that you would send) to view the gallery only. This is ideal for professional photographers who want to upload a private photoshoot and allow the customers only to view the photos. You can also set options for them only to download either for free (if you have already included this in your photoshoot price) or set options to purchase downloads or prints. Additionally if these are just personal photos for family or friends you can choose this option to only allow them to view.
Private: This option will only allow you personally to view the gallery when logged in. This is ideal for storage of your photos. If you want to simply upload for storage but not for viewing then you can put them all in one private gallery, or more.
Web Searchable: Here you can choose to make your gallery appear in searches on search engines, or disable this feature for a specific gallery. You get the choice between site settings (which you would setup in account settings – discovery – site visiblity), or “no” for that particular gallery.
Smugmug Searchable: Same applies here. You can choose to restrict this gallery from appearing in the Smugmug photo sharing community or not.
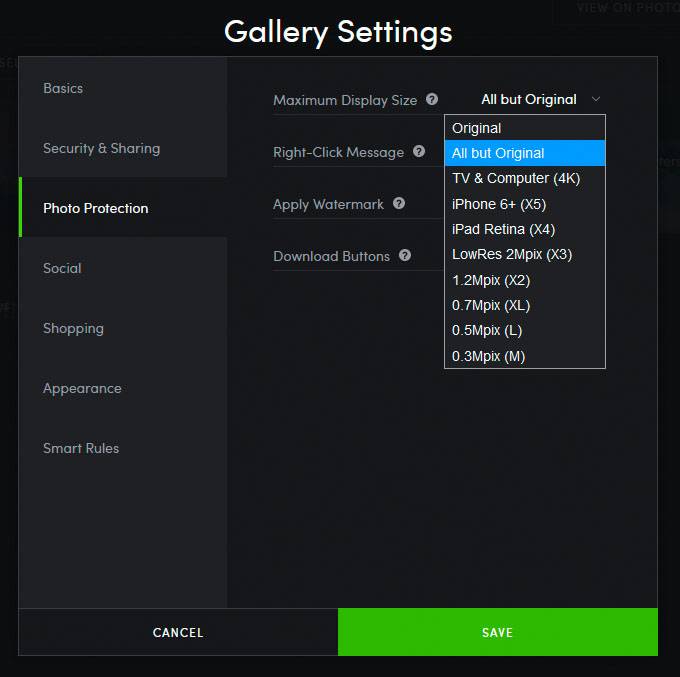
Photo Protection
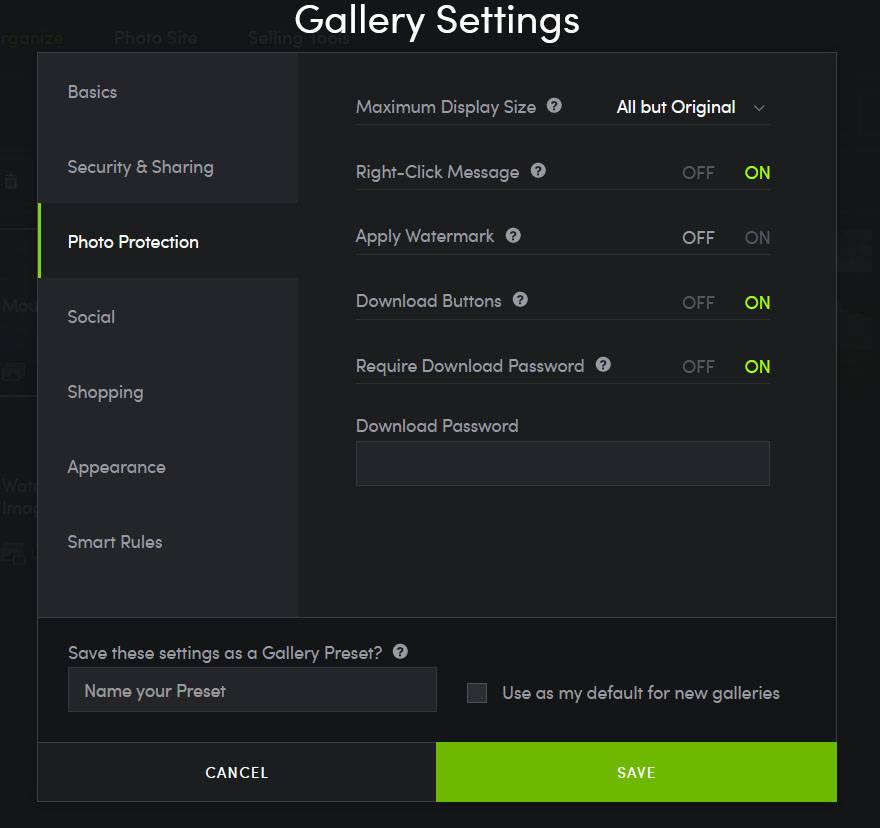
Maximum display size: Here you can restrict the size at which your photos can be displayed. Remember that Smugmug will automatically size your images for optimal page speeds, but when people click to view full screen if they have super large monitors they could effectively screen capture or save a large version of your photo. You can set other protections too (We’ll talk about that later), but still some of these can be overridden by anyone who is tech savvy.
I personally set “all but original”, to ensure that no one can download the original files unless I allow it via the download button.
Right click message: When enabled this will disable the ability to right click and save the photo being displayed on the screen and give a warning message. You can customise the message in account settings.
How to add a watermark
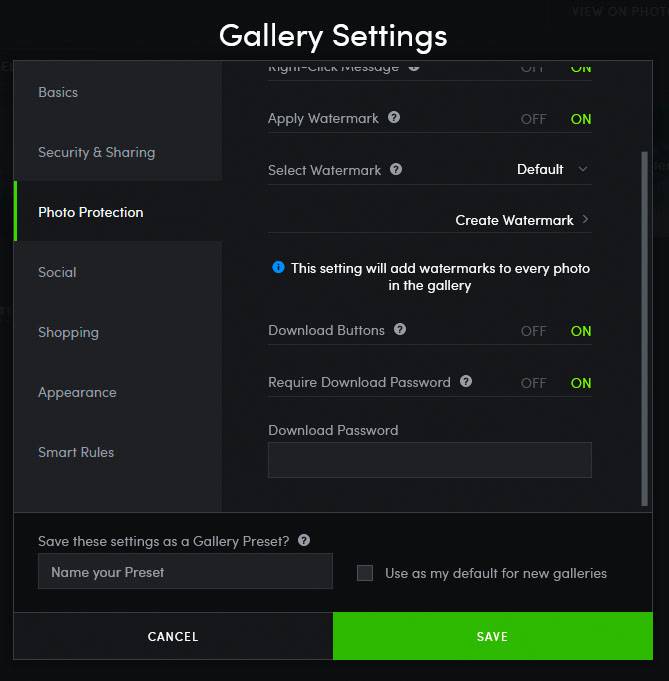
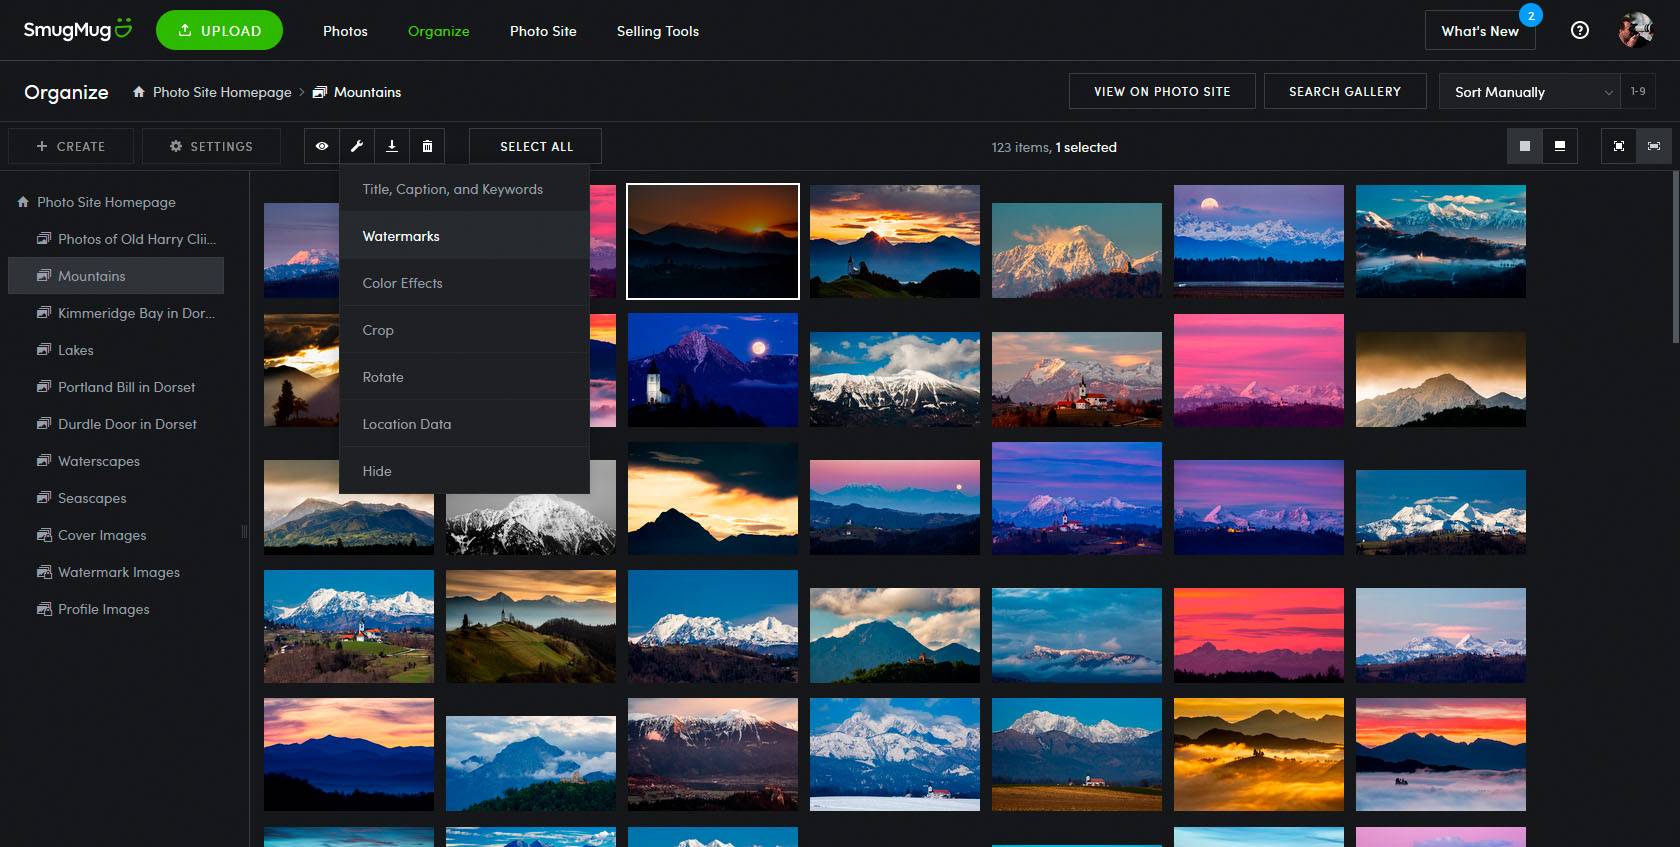
Select watermark: Here you can choose to apply a watermark to all the photos in your gallery. You can simply click “create watermark” to make as many as you like and then select the saved watermark for each gallery. Go to gallery settings to apply the watermark across all images in that gallery, or you can select individual photos or multiple photos, click the tools button (the spanner) and select watermark
How to download an entire gallery or one photo
Download buttons: Turning on this option in gallery settings enables you to allow visitors to easily download your original sized photos.
You can also select yes to require a password. Set the password yourself and then send it to anyone to whom you want to give permission.
This is ideal again for customers of your private photo shoots, or to restrict to friends or family.
How to setup the shop and sell photos
If you want to enable print and download sales of your photos then first you need to have either a Portfolio or Pro account.
Once you have this, then you need to set your prices and enable the products you want to sell. You can do this by going to selling tools – pricelists – manage. Watch my video below for a full rundown.
Once you have this setup, you can enable or disable the shop view and visitor cart in gallery settings.
You can also set a printmark if you want to have your name or logo printed on the final product.
Backprinting also allows you write a short message to buyers which will be printed on the back of the product.

How to set the gallery appearance
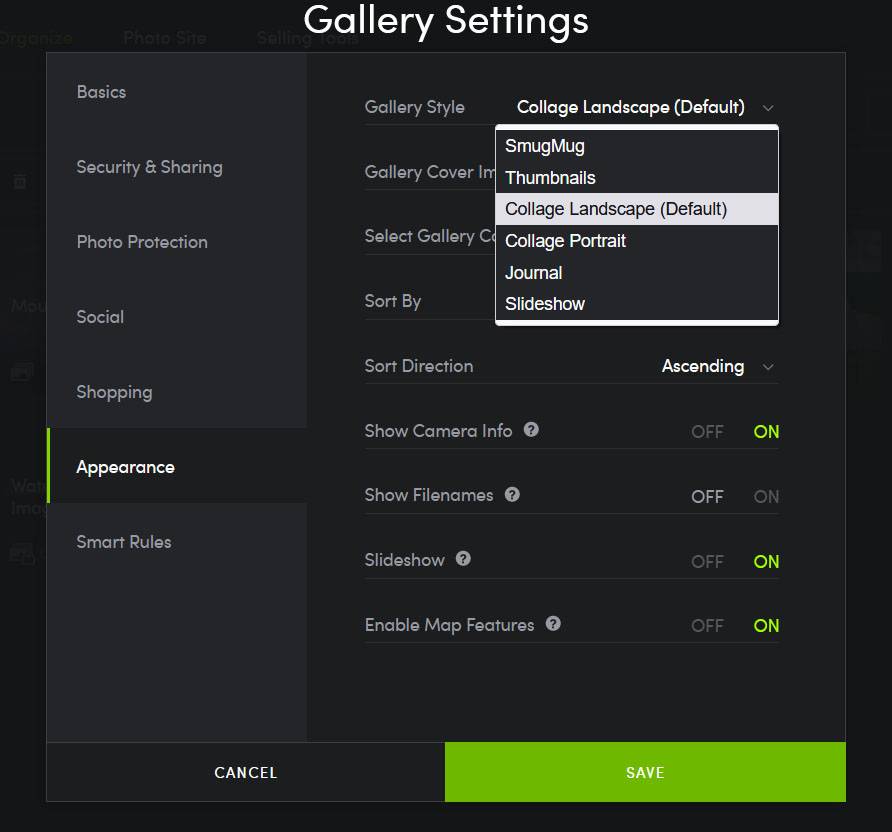
In the “Appearance” tab you can choose the gallery style, cover image, set sort by and other options. The slideshow option allows a full page slideshow to run when any photo is clicked. You can turn this on or off.
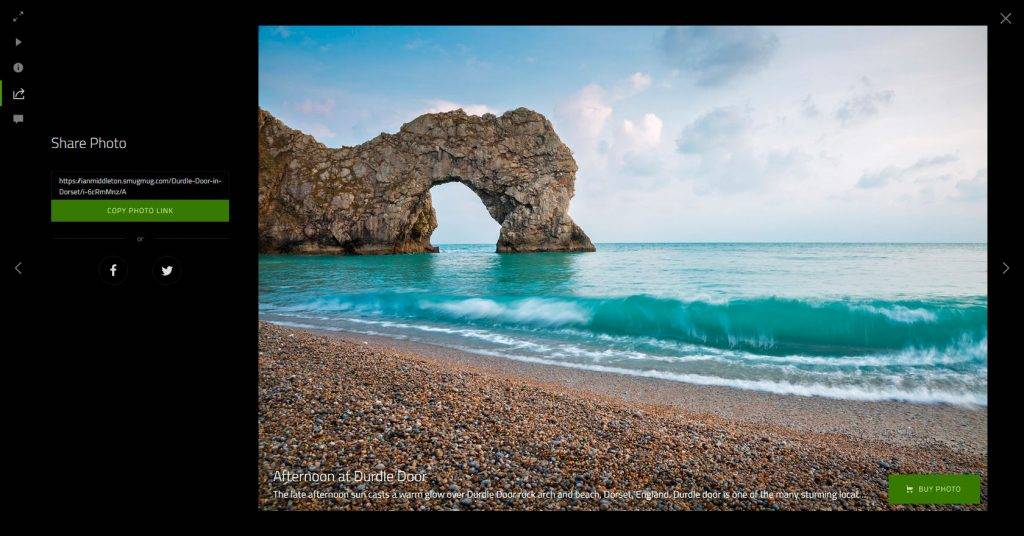
Below are some examples of the gallery styles you can choose from.
Watch the video
Here you can watch my YouTube video which runs you through it all step by step.







One Response