Use the Histogram to Perfect your Exposure
I’ve been shooting landscapes for a long time, and one of the single biggest improvements I ever made to my photography had nothing to do with buying a new lens or upgrading my camera body. It was simply learning to trust the histogram over my own eyes.
If you’ve ever come home from a shoot and discovered that a photo you thought looked great on the camera screen is actually overexposed (areas of sky blown to pure white, detail gone, nothing you can do about it) then you know exactly what I’m talking about. The fix is straightforward: learn to read your camera histogram, and use it every time you shoot.
In this article I’m going to break it all down for you. What the histogram actually shows, how to spot highlight and shadow clipping, what to do about them, and how to use the histogram proactively to nail your exposure before you even take the shot.
What Is a Camera Histogram?
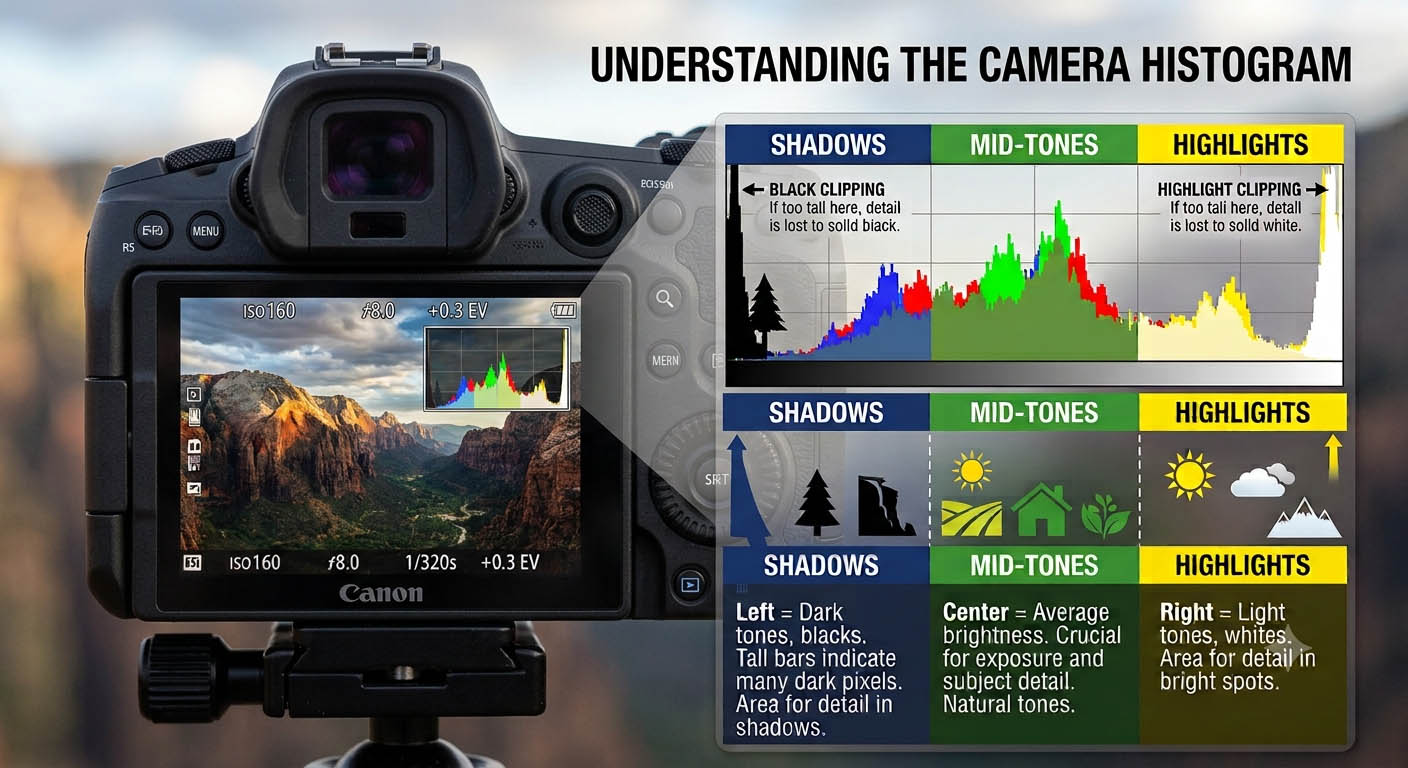
At its simplest, a camera histogram is a graph of brightness values. Every pixel in your image has a brightness value somewhere between 0 (pure black) and 255 (pure white), and the histogram plots all of those values simultaneously in a bar chart.
The horizontal axis represents brightness — shadows and dark tones on the left, bright tones and highlights on the right. The vertical axis represents the number of pixels at each brightness level. A tall peak in the graph means lots of pixels at that brightness. A flat area means few or none.
What makes it so useful is that it’s completely objective. Your camera’s LCD screen changes in apparent brightness depending on the light around you — in bright sunshine it can look dim, making you think your image needs brightening. In a dark environment it can look too bright, leading you to underexpose. The histogram doesn’t care. It gives you the same data regardless of what’s happening around you.
Once I started using it properly, I stopped getting unpleasant surprises on my computer screen.
How to Read a Histogram: The Three Zones
It helps to think of the histogram as divided into three zones:
Left side — shadows: Pixels here are very dark or pure black. A large peak on the far left means your image has a lot of dark tones or shadow areas.
Centre — midtones: This is where the mid-grey tones sit — green foliage, blue sky, skin tones, textured stone. A well-exposed scene for most everyday subjects will tend to have a healthy spread through the centre of the histogram.
Right side — highlights: Pixels here are very bright or pure white. A large peak on the far right means your image has significant bright areas — sunlit water, white clouds, snow, a bright sky.
One thing worth understanding early on: there is no single “correct” histogram shape. A silhouette shot at golden hour will have masses of pixels at the dark end and some at the bright end, with very little in the middle — and that’s completely fine if that’s the image you intended. A misty, low-contrast scene might produce a histogram bunched in the centre that barely reaches either side. The histogram tells you what’s there. You decide whether what’s there is what you wanted.
What the histogram does tell you reliably is when something has gone wrong — and the two most important things to watch for are highlight clipping and shadow clipping.
What Is Highlight Clipping — and Why Does It Ruin Photos?
Highlight clipping (also called blown-out highlights) occurs when areas of your image become so bright that the camera sensor simply can’t record any detail. Those pixels are rendered as pure, flat white — no texture, no gradation, no colour. And crucially, in most cases that information is gone permanently.
On the histogram, you’ll see it as a spike hard against the right edge of the graph — the data has, quite literally, run off the scale.
This is something I encounter regularly shooting landscapes in Slovenia. Big skies, bright water, sunlit mountain peaks — all of these can easily tip into clipping if you expose for the shadowed foreground rather than the sky. And once a sky clips, there’s nothing left to recover. It becomes a flat white void with no cloud detail, no gradation, nothing.
Common situations where highlight clipping sneaks in:
- Bright sky behind a darker subject
- Snow or pale sand in direct sunlight
- Water or glass with strong specular reflections
- White flowers or clothing in outdoor light
- Sunrise or sunset light sources in frame
How to Fix Highlight Clipping
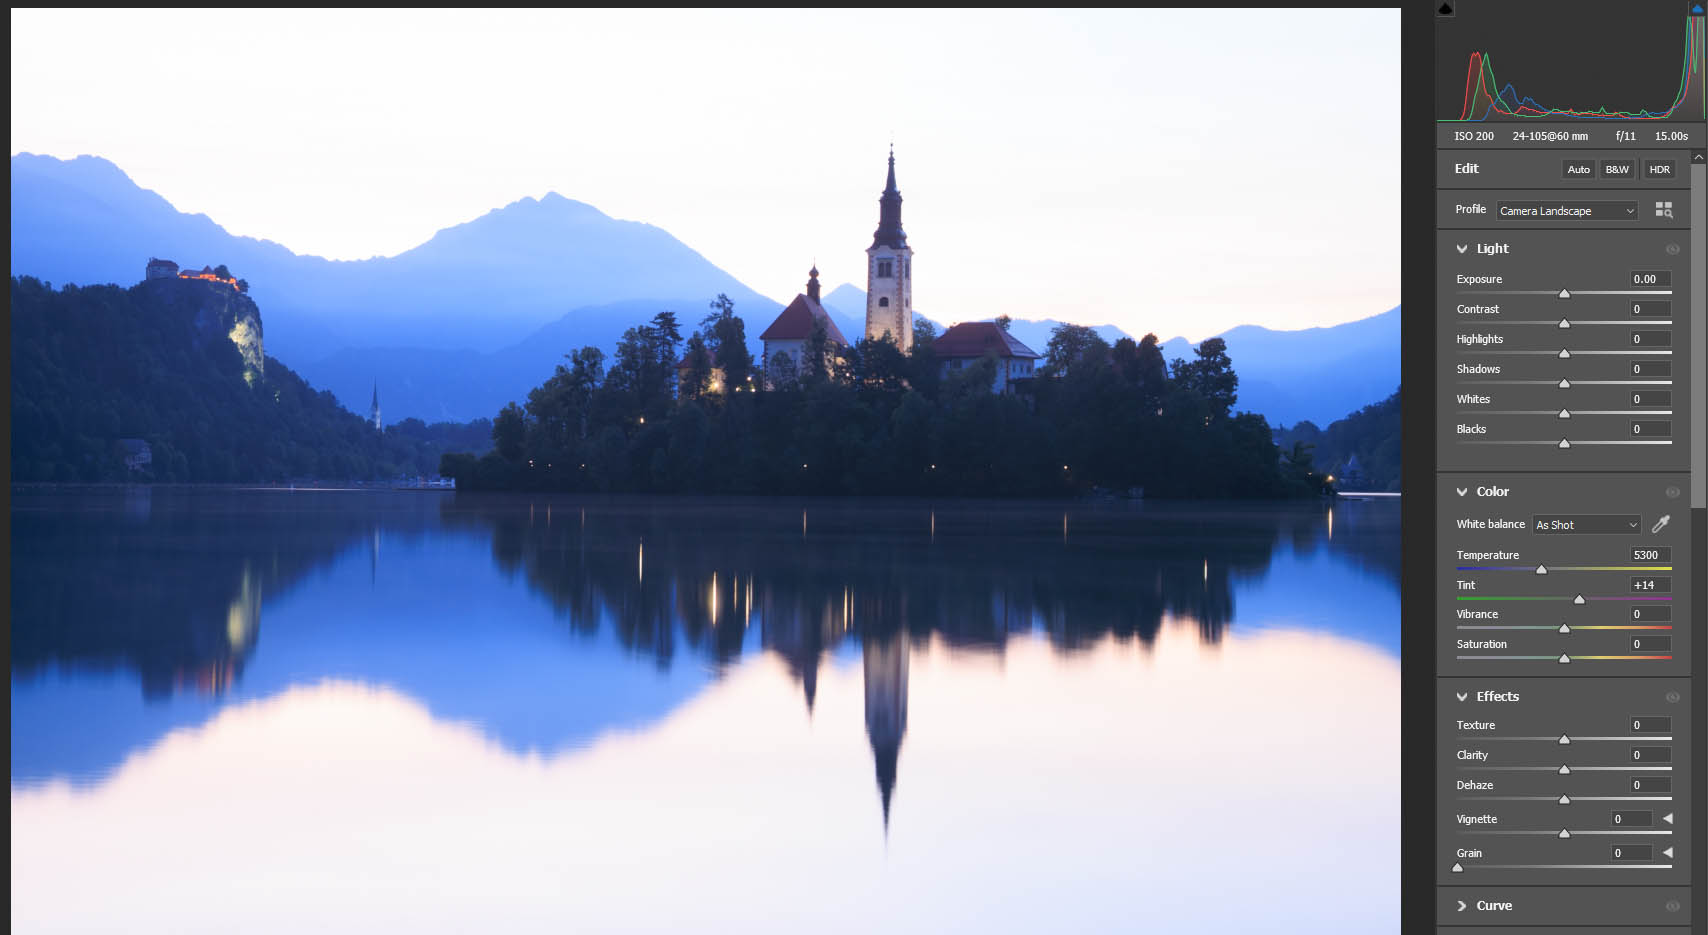
If you see a spike against the right wall of your histogram, reduce your exposure. Use a faster shutter speed, close your aperture down slightly, lower your ISO, or dial in some negative exposure compensation. Keep adjusting until that spike falls away from the right edge.
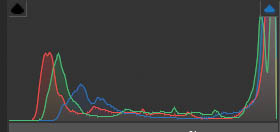
In some high-contrast scenes, you may find it impossible to protect both the bright sky and the dark foreground at the same time. That’s a dynamic range problem — more on that below. But the histogram will make it instantly visible so you can decide how to handle it.
If you end up with clipped highlights in an image you’ve already taken, check out my article on how to fix blown out highlights in Photoshop — it covers what you can and can’t recover in editing. Or watch my YouTube video.
What Is Shadow Clipping?
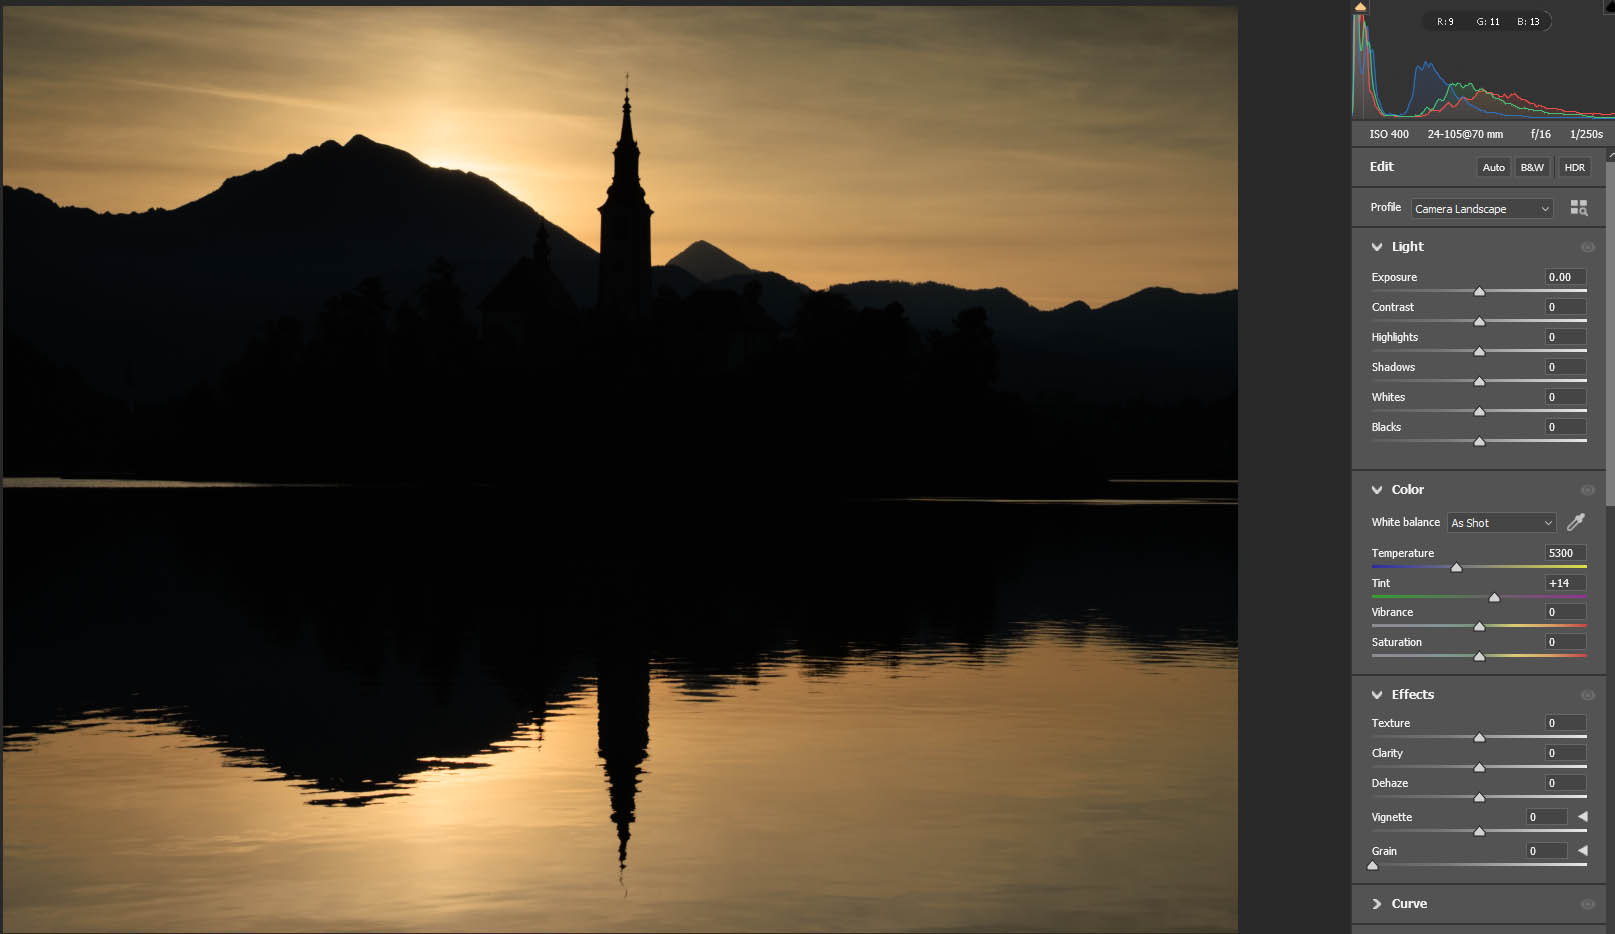
Shadow clipping is the mirror image of highlight clipping. It happens when dark areas of your image fall so far below what the sensor can detect that they’re recorded as pure black — no detail, no texture, just a flat void. On the histogram, you’ll see it as a spike or cutoff against the left edge.
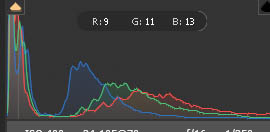
Shadow clipping shows up in images where the dark areas have been underexposed or where the scene has more contrast than the sensor can handle. A subject in heavy shade against a bright background, interior details in a room photographed from outside, or foreground trees in a landscape at sunrise can all clip to pure black if you’re not careful.
Have a look at my article on shadows in photography if you want to understand how shadows work visually — understanding them creatively goes hand in hand with understanding how to handle them technically.
How to use the clipping warnings in Adobe Camera RAW
When Shadow Clipping Is Fine — and When It Isn't
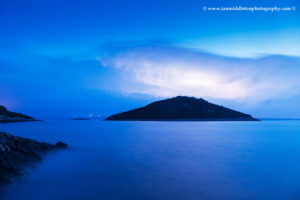
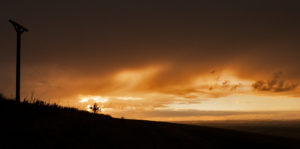
Here’s the thing: shadow clipping isn’t always a problem. Some of my favourite images have large areas of pure black — dramatic sunsets & sunrises, silhouettes, high-contrast night or blue hour scenes. When deep blacks are a creative choice, clipping the shadows is entirely intentional and the histogram is just confirming what you already decided to do.
It becomes a technical problem when you didn’t intend it. If you wanted detail in the foreground of that landscape shot and the histogram is telling you those pixels are sitting at zero, you’ve lost something you can’t necessarily get back. In that case, increasing your exposure — slower shutter speed, wider aperture, higher ISO, or positive exposure compensation — will help bring those shadow areas back into range.
The Histogram and Dynamic Range: What Happens When the Scene Exceeds Your Sensor?
Every camera sensor has a finite dynamic range — the difference in stops between the darkest shadow it can capture with detail and the brightest highlight. When a scene has more contrast than your sensor’s dynamic range can accommodate, you’re going to clip somewhere, no matter what you do.
The histogram makes this immediately obvious: if you’re seeing spikes at both ends of the graph simultaneously, the scene’s contrast range exceeds your camera’s capacity. You have a few options:
- Expose for the highlights and accept shadow clipping (often the right call for skies and sunsets)
- Expose for the shadows and accept some highlight clipping (risky — harder to recover)
- Use a compromise exposure that minimises clipping at both ends
- Use a graduated ND filter to reduce the brightness of the sky and bring the scene within your sensor’s range — I cover how to do this in my tutorial on the graduated filter tool in Adobe Camera RAW
- Bracket your exposures and blend them in post-processing
Understanding how light behaves in a scene is closely linked to this. If you’d like to go deeper on that side of things, my article on understanding lighting for photography is a good companion read.
Using the Histogram to Get the Correct Exposure
For a typical scene — not a silhouette, not a pure white high-key shot, just a normal well-exposed image — you’re looking for a histogram that:
- Has no spike hard against the right edge (highlights are safe)
- Has no spike hard against the left edge (shadows are retained, unless you intended them to clip)
- Shows a spread of tones that reflects the scene you’re photographing
- Sits roughly centred, with the bulk of the distribution in the midtone area
Getting there in practice is just a matter of making an exposure, checking the histogram, and adjusting until it looks right. It takes seconds, and it quickly becomes second nature.
What Is ETTR (Expose to the Right)?
One of the most useful things the histogram enables is a technique called Expose to the Right, or ETTR. The idea is to push your exposure as far to the right as possible — making the image as bright as it can be — without actually tipping into highlight clipping.
Why? Because digital sensors capture significantly more tonal information in the brighter half of the exposure range. An image exposed brighter will have more data to work with in post-processing: cleaner shadow detail, less noise when you lift the darker areas, and more flexibility overall. When you shoot RAW, this matters.
I’ve written a full article about this technique — Exposing to the Right: the benefits — and I’d recommend reading it alongside this one. But the histogram is the tool that makes ETTR practical: you can see exactly how close to clipping you are and fine-tune your exposure with confidence.
The Histogram in Your Editing Software
So far I’ve been talking about the histogram in-camera, but it’s just as valuable when you’re editing.
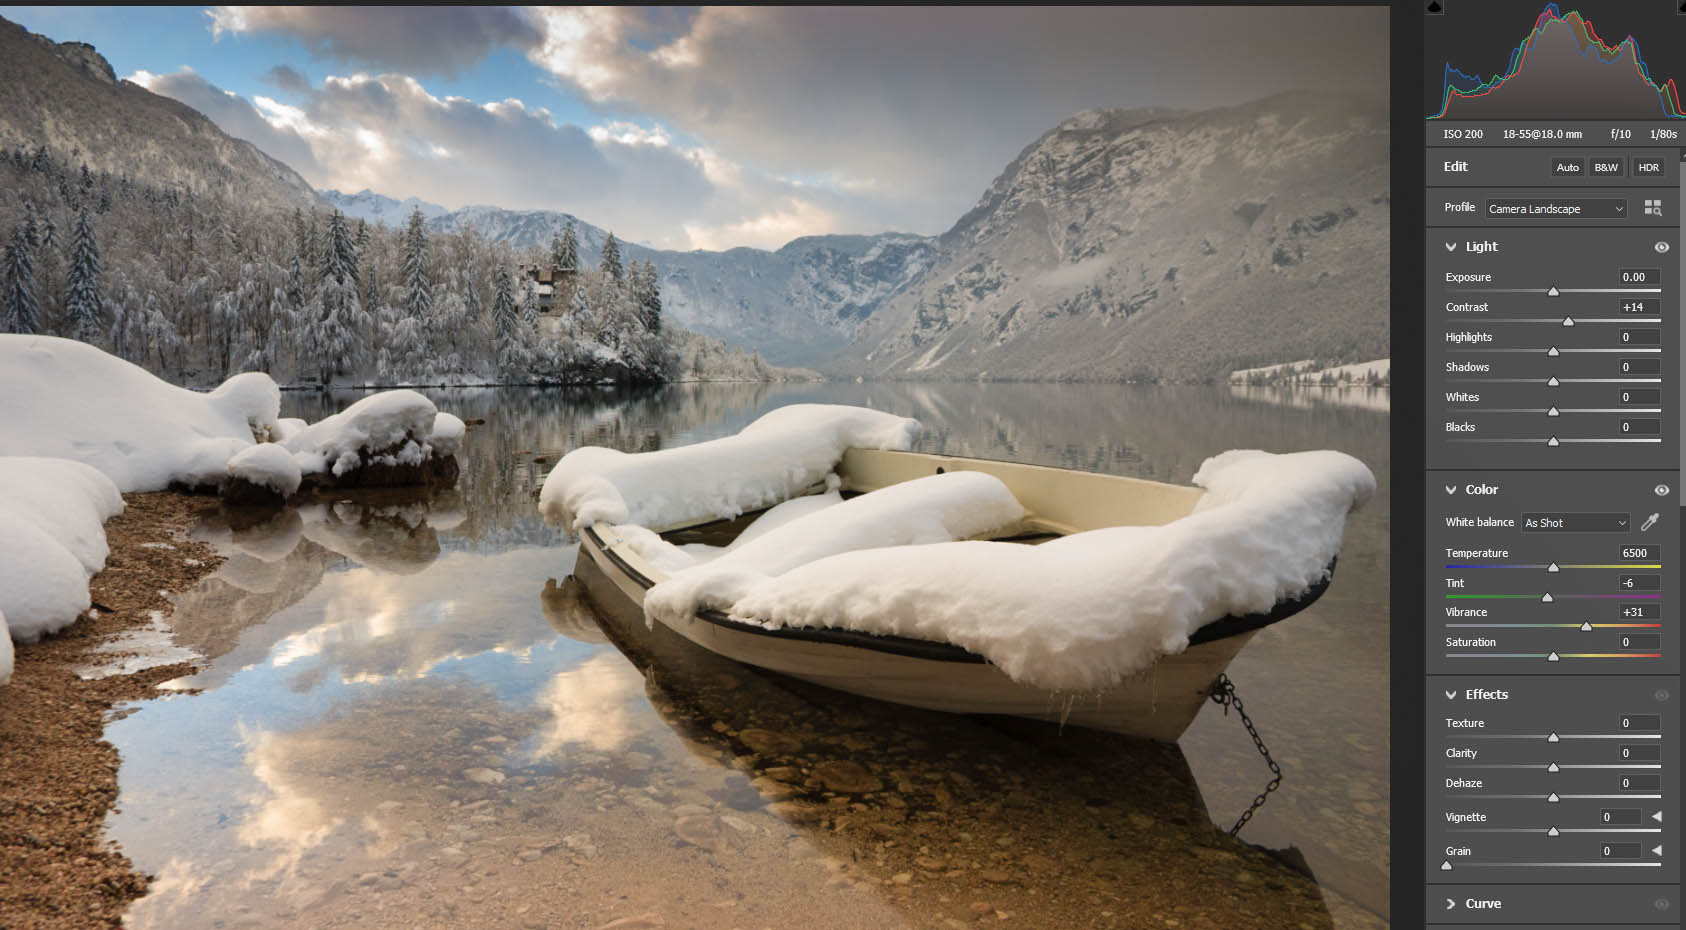
In Adobe Lightroom and Adobe Camera RAW, the histogram is live and interactive. You can hover over different parts of the histogram to see which areas of your image correspond to those tones, and click the small triangles in the top corners to activate clipping warnings — any clipped highlights are shown as a red overlay on the image, clipped shadows in blue. This makes it immediately clear exactly where the problem areas are.
For a detailed walkthrough of how to use these features when editing your RAW files, see my tutorial on how to edit RAW images in Adobe Camera RAW.
The histogram in editing software also helps you understand why shooting in RAW is so much more forgiving than JPEG. A JPEG is a processed file — once it’s clipped, it’s clipped. A RAW file retains more headroom in both the highlights and shadows, meaning that slight clipping at the edge of the histogram can often be recovered with the Highlights or Shadows sliders. Severe clipping in RAW is still unrecoverable, but you have significantly more room to work with.
The Histogram and Shutter Speed
One of the most common ways to adjust exposure when you see clipping in the histogram is to adjust your shutter speed — and it’s worth having a solid grasp of how shutter speed works as part of your overall exposure control. My article on shutter speed — what is it? covers this in detail if you want a refresher.
Faster shutter speed = less light = darker image (histogram moves left) Slower shutter speed = more light = brighter image (histogram moves right)
Of course, changing your shutter speed also affects motion blur, so you’ll often need to balance it against your other exposure settings depending on what you’re photographing.
Quick Histogram Reference
| What you see | What it means | What to do |
|---|---|---|
| Spike against the right edge | Highlight clipping — bright detail is gone | Reduce exposure |
| Spike against the left edge | Shadow clipping — dark detail is gone | Increase exposure (if detail is needed) |
| Distribution bunched to the left | Underexposure — image too dark overall | Increase exposure |
| Distribution bunched right, no spike | Bright scene or successful ETTR | Check highlights — fine if no spike |
| Gradual spread through the middle | Well-balanced midtone exposure | Generally correct for typical scenes |
| Spikes at both edges | Scene exceeds dynamic range | Bracket, filter, or make a creative compromise |
Frequently Asked Questions
What does a good histogram look like in photography?
It depends entirely on your scene and your intent — there's no single "correct" shape. For a typical, well-balanced scene, you'll generally want a distribution that spreads across the tonal range without hard spikes pushing against either edge. Think of it less as matching a template and more as checking that what the histogram shows reflects what you intended to capture.
What does a spike on the right side of the histogram mean?
A spike hard against the right edge means highlight clipping — some pixels in your image have exceeded the maximum brightness the sensor can record and will appear as pure white with no detail. The larger the spike, the more widespread the clipping. Reduce your exposure until the spike drops away from the right wall.
Can you recover blown-out highlights when editing?
In a RAW file, very slight clipping at the right edge can sometimes be partially recovered by pulling down the Highlights slider in Lightroom or Camera RAW. But truly clipped pixels — those that have hit pure white — contain no information and can't be recovered. In a JPEG, even slight clipping is usually unrecoverable. This is exactly why it's better to prevent clipping in-camera than to try to rescue it in post. See my article on how to fix blown out highlights in Photoshop for what can and can't be done.
What is ETTR and should I use it?
ETTR stands for Expose to the Right — it's a technique where you deliberately push your exposure as bright as it can go without clipping the highlights. This maximises the data captured in your RAW file and produces files with less noise, better shadow detail, and more editing flexibility. The histogram is what makes it possible to do this accurately. I explain it in much more detail in my dedicated article on Exposing to the Right.
Is shadow clipping always a problem?
No — in fact, it's often a deliberate creative choice. Deep, pure blacks add drama and contrast, and plenty of great images have significant shadow clipping. It only becomes a technical problem when you wanted shadow detail that's no longer there. The histogram lets you see exactly when and how much shadow clipping is occurring, so you can decide whether it's intentional or something to address.
Why can't I just judge exposure from the camera screen?
Your camera's LCD screen changes in apparent brightness depending on the ambient light around you. In bright sunlight it can look dim, leading you to overexpose. In a dark room it can look bright, leading you to underexpose. The histogram is immune to this — it reads the actual tonal data in your file, not how the screen renders it. That's why it's always more reliable than judging by eye alone.
What is the difference between a luminance histogram and an RGB histogram?
A luminance histogram shows the overall tonal distribution as a single graph. An RGB histogram shows three separate graphs — one for each colour channel (red, green, blue) — so you can see if a single channel is clipping even when the overall luminance looks fine. For most exposure monitoring, the luminance histogram is perfectly sufficient. The RGB histogram becomes more useful when you're working with strongly saturated colours, where individual channels can clip before the overall exposure looks wrong.
How does the histogram help with landscape photography specifically?
In landscape photography the histogram is particularly valuable for managing challenging lighting — bright skies against darker foregrounds, golden hour sunsets with extreme dynamic range, misty scenes where you want detail throughout. It lets you see whether you've protected the sky, whether the foreground shadow areas still hold detail, and whether the overall tonal balance reflects what you're trying to achieve. I use it on virtually every shot when I'm out in the field.
Final Thoughts
The histogram is one of those tools that, once you start using it properly, you wonder how you ever managed without it. It takes away the guesswork, confirms what you’re seeing on screen, and gives you the data you need to make good decisions about exposure both in the field and when editing.
Spend a bit of time getting familiar with it the next time you’re out shooting. Make an exposure, check the histogram, adjust, check again. Within a session or two it becomes automatic — and your hit rate for well-exposed images will improve noticeably.
If you want to go further with your exposure technique, my articles on Exposing to the Right and how to avoid clipping your highlights and shadows in post-processing are good next steps.