"photo editing is cheating"
You might hear many people say
"get it right in camera!"
the purists say
Well, the latter is correct, but the former is incorrect. Editing your photos is not cheating. The simple fact is that all images need post production work using some form of photo editor, whether that is Photoshop, Lightroom or even a free photo editor like GIMP. The SOOC (straight out of camera) brigade will have you believe that you must shoot in JPEG, get it right in camera and leave it untouched. Well, I’m going to show you just how misguided that belief is. In this article I’ll show you all about the importance of photo editing.
Getting it right in camera is critically important, there is no denying this. You cannot turn a bad photo into something outstanding. Essentially it’s all about the light (read more about that here)
But even so, all photographs have to go through the editing stage. Getting it right in camera is just the first step. The truth of the matter is that if you shoot in JPEG only, then your camera does the “photoshopping” for you. So your JPEG has been edited already, except it wasn’t by you. Be under no illusions that your SOOC JPEG is pure and untouched. It has been run through the built in photo editor inside your camera. This is an automatic computer program that more often than not gives you more unnatural results than a manually edited photo will. This built in photo editor has done the editing for you.
"Using a computer is cheating"
This is what someone once said to me. Well, what do you think you are taking a photo with? Your digital camera is a computer, and your photograph is a huge computer data file. Unlike film, your camera’s sensor captures data, and this data must then be processed into a photograph. A JPEG is the end result, processed by the camera. But all digital cameras capture the data in RAW format. You can choose to save this RAW data in a RAW file. Then you can process the photo yourself.
What is RAW?
If we compare film and digital photography, you can think of RAW as a digital negative, and JPEG as the final print. In the old days of film we took our negatives to the camera shop for processing and they gave us back a set of prints. How those prints looked would often depend on how good the processing lab you used was. Go to the cheap one at the pharmacy and you would get a spotty teenager who would feed your negatives into a machine, press a few buttons and then give you what came out the other end!
But go to a professional lab and you would get a professional who would work hard to get the best prints possible from your negatives. It’s not a simple case of making a print from the negative. Photo editing has always been done, even in the darkroom. And this is also true with digital photography.
Shooting in JPEG
When you shoot in JPEG, the camera’s digital sensor captures the RAW data, it then transfers this RAW data to the camera’s internal microprocessor (mini computer if you prefer), which then processes the photo to produce the JPEG file. How this JPEG looks very much depends on the picture style you have set your camera to. If you have set it to landscape, the camera will then boost contrast and colour and sharpen the image. If you have set it to portrait, it will try to produce a softer image with more natural looking skin tones.
Either way, the camera’s photo editing software manipulates the data and makes the choice for you. In general, camera manufacturers are catering to the average user and assume that if you are shooting in JPEG, you are not a professional and therefore want a nice colourful image with lots of brightness and contrast. And what’s more important is that to give you such a small file size, the camera then discards all the data that was not used and not only saves enough to give the photo it created, but also compresses this data. Therefore, each time you edit or re-save a JPEG you are losing quality and slowly destroying the image.
When you shoot in RAW, you get to choose how your final image looks by using a RAW editor such as Adobe Camera RAW (ACR) or your camera manufacturer’s RAW photo editing software.
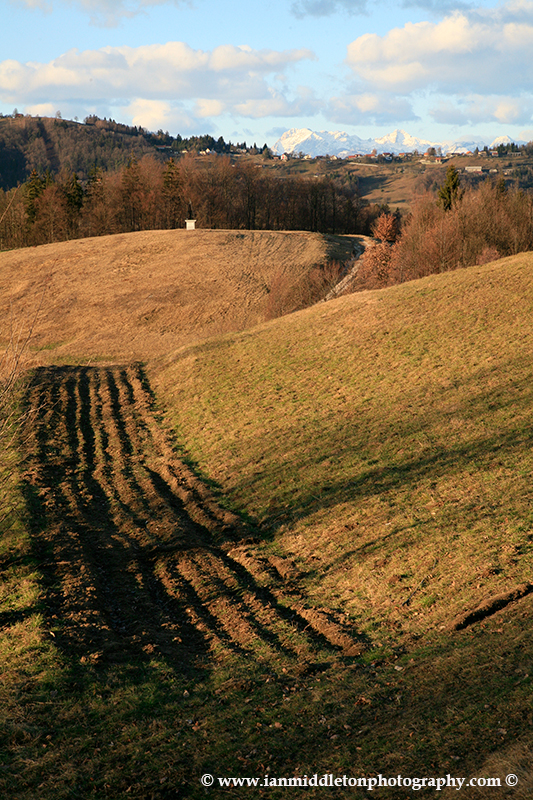
JPEG - Straight out of camera
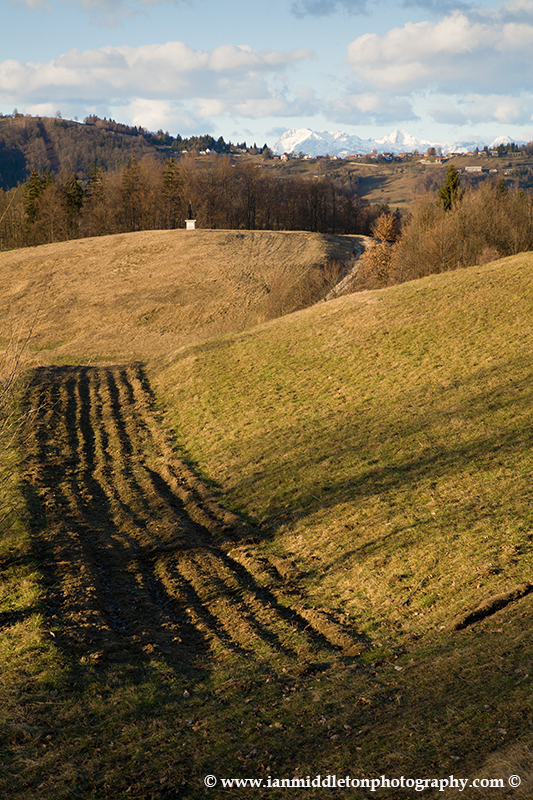
RAW processed by me
How was it done?

Example: This image was saved simultaneously in RAW and JPEG (in landscape style). In the camera's JPEG version, notice how unnaturally blue the sky looks, and the amount of red in the cloud (It wasn't that close to sunset) and the enhanced brown and red of the grass. Also look at the histogram compared with the RAW file below.
RAW file opened in Adobe Camera RAW (ACR):

This is the RAW file, opened in the RAW photo editor program Adobe Camera RAW (ACR) but so far untouched. How your photo looks will depend on the RAW editor you are using. Firstly, see the difference in the histogram. In the JPEG version the camera has spread the data more evenly across the histogram.
Notice here how the sky looks more naturally blue and the clouds are white. Also the grass looks a bit greener.
My finished version:


How your final version will look very much depends on you and what you are trying to achieve. For me, I wanted to keep this scene looking as natural as possible and, as ACR had already interpreted the RAW file quite well, I only need to make a few small adjustments.
Extremes of contrast
As is common with landscape photos, especially like here where the emphasis is on the land rather than the sky, the difference in brightness between the land and the sky can often be too much for the camera to handle. Our eyes can see a much wider range of brightness. Simply put, this means that we can look at a scene like this and see much more detail in the bright parts and the shadows than the camera can.
So in order to compensate for this we either have to use a special ND grad filter, or you can use the graduated filter in Photoshop or the RAW converter. Or when the difference is even bigger than it is here, you can take multiple exposures and blend them. Here, as the difference was within the range that the RAW file could capture, I used the graduated filter tool in ACR to darken the top of the sky and bring back some detail.
Vibrance
I have also used the vibrance tool to bring back some of the green that was lacking here, and tweaked the blue in the sky a touch. As you can see the sky’s blue looks a lot more natural now.
Conclusion
So, in conclusion, by shooting in RAW and doing the photo editing myself, not only have I taken control, but have a more natural looking image than the one processed by the camera. While you can edit a JPEG you have far less control and data to use, so it is therefore much better to shoot in RAW.


Adobe Photoshop Creative Cloud Photography Plan
It’s now much easier to use Adobe Photoshop or Lightroom with their new Adobe Photoshop Creative Cloud Photography Plan, which gives you both programs for less than £10 per month. If you click the link here you can buy 12 months subscription upfront at a discount. (Affiliate Link)
Learn how to edit in ACR here
My book
Learn Photography
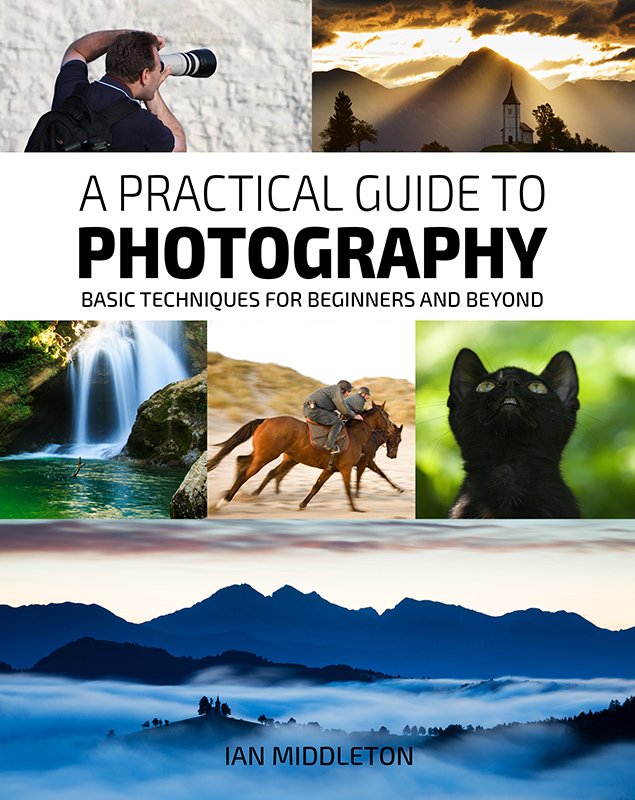
For a more comprehensive look at photography, check out my book, available to buy at Amazon.
Shedding light on all the photography basics in one book.
Want to know how to take better photos? Well, first you need to master the basic techniques. Whether you are a complete beginner or an intermediate looking to improve your photography, this book is packed with photography techniques, tips and advice for beginners and intermediates.
All the camera functions and their effects explained.



One Response
Thought-provoking post! Using a photo editor is a tool for enhancing and refining images, not cheating. It’s all about improving the visual impact while respecting the original content. Thanks for addressing this important aspect of photo editing!