USe the Histogram
Have you ever been using Adobe Camera RAW and wondered what those little warning triangles on either side of your histogram were? Well the histogram is the ideal tool to ensure you avoid clipping your shadows and highlights
How about what happens when you push your histogram too far to the left or right?
Well here I will explain to you all about the histogram and help you understand how to read it, and how to use those triangles and other hidden features to avoid clipping your highlights and shadows.
The histogram shows us the tonal range within an image. It’s shown in graphical form and is a great indicator of whether or not we have exposed our image well. Each point along the graph represents a tonal value starting at 0 and going through to 255.
What the Histogram looks like
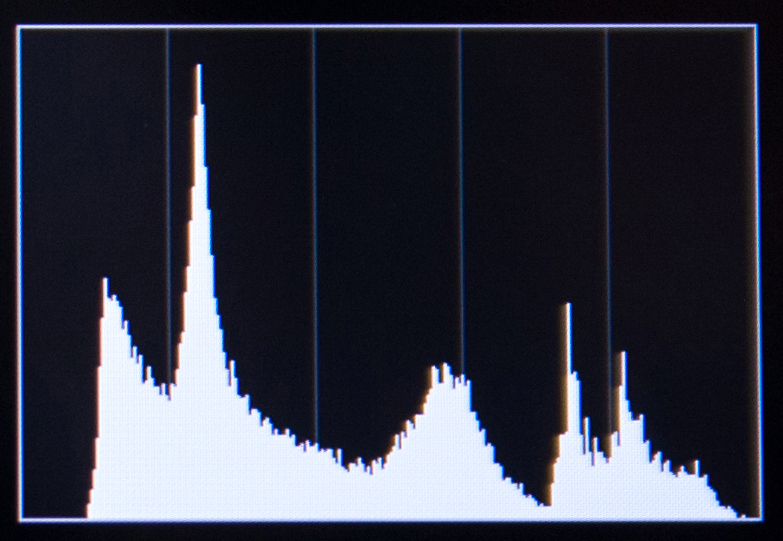
Shadows, Midtones, Highlights
Far left to 0 indicates how much shadow detail is present
Far right to 255 indicates how much highlight detail is present
The midway point indicates how much midtone detail is present
Anything beyond 255 is completely white with no detail present. Anything below 0 is completely black with no detail present.
You can also think of these as colours:
Shadows = Black or dark colours
Midtones = Grey or muted colours
Highlights = White or bright colours
The height of each line represents the amount of pixels in your image that contain that tone. So for example, the big peak shows there are a lot of pixels containing the tonal value. Notice also that on the far left there is an area with no lines. This means that there are no pixels with those tonal values. So there are no dark shadows from 0 to about 10.
Histogram on your camera
On your camera not only are you able to view the histogram when reviewing a photo you have taken, but also on the liveview function when taking the photo. Check your camera’s manual for exact details, but it usually involves pressing the info button to bring it up. This is an essential tool for checking that your exposure is good, both while taking the photo (if using liveview) and afterwards.
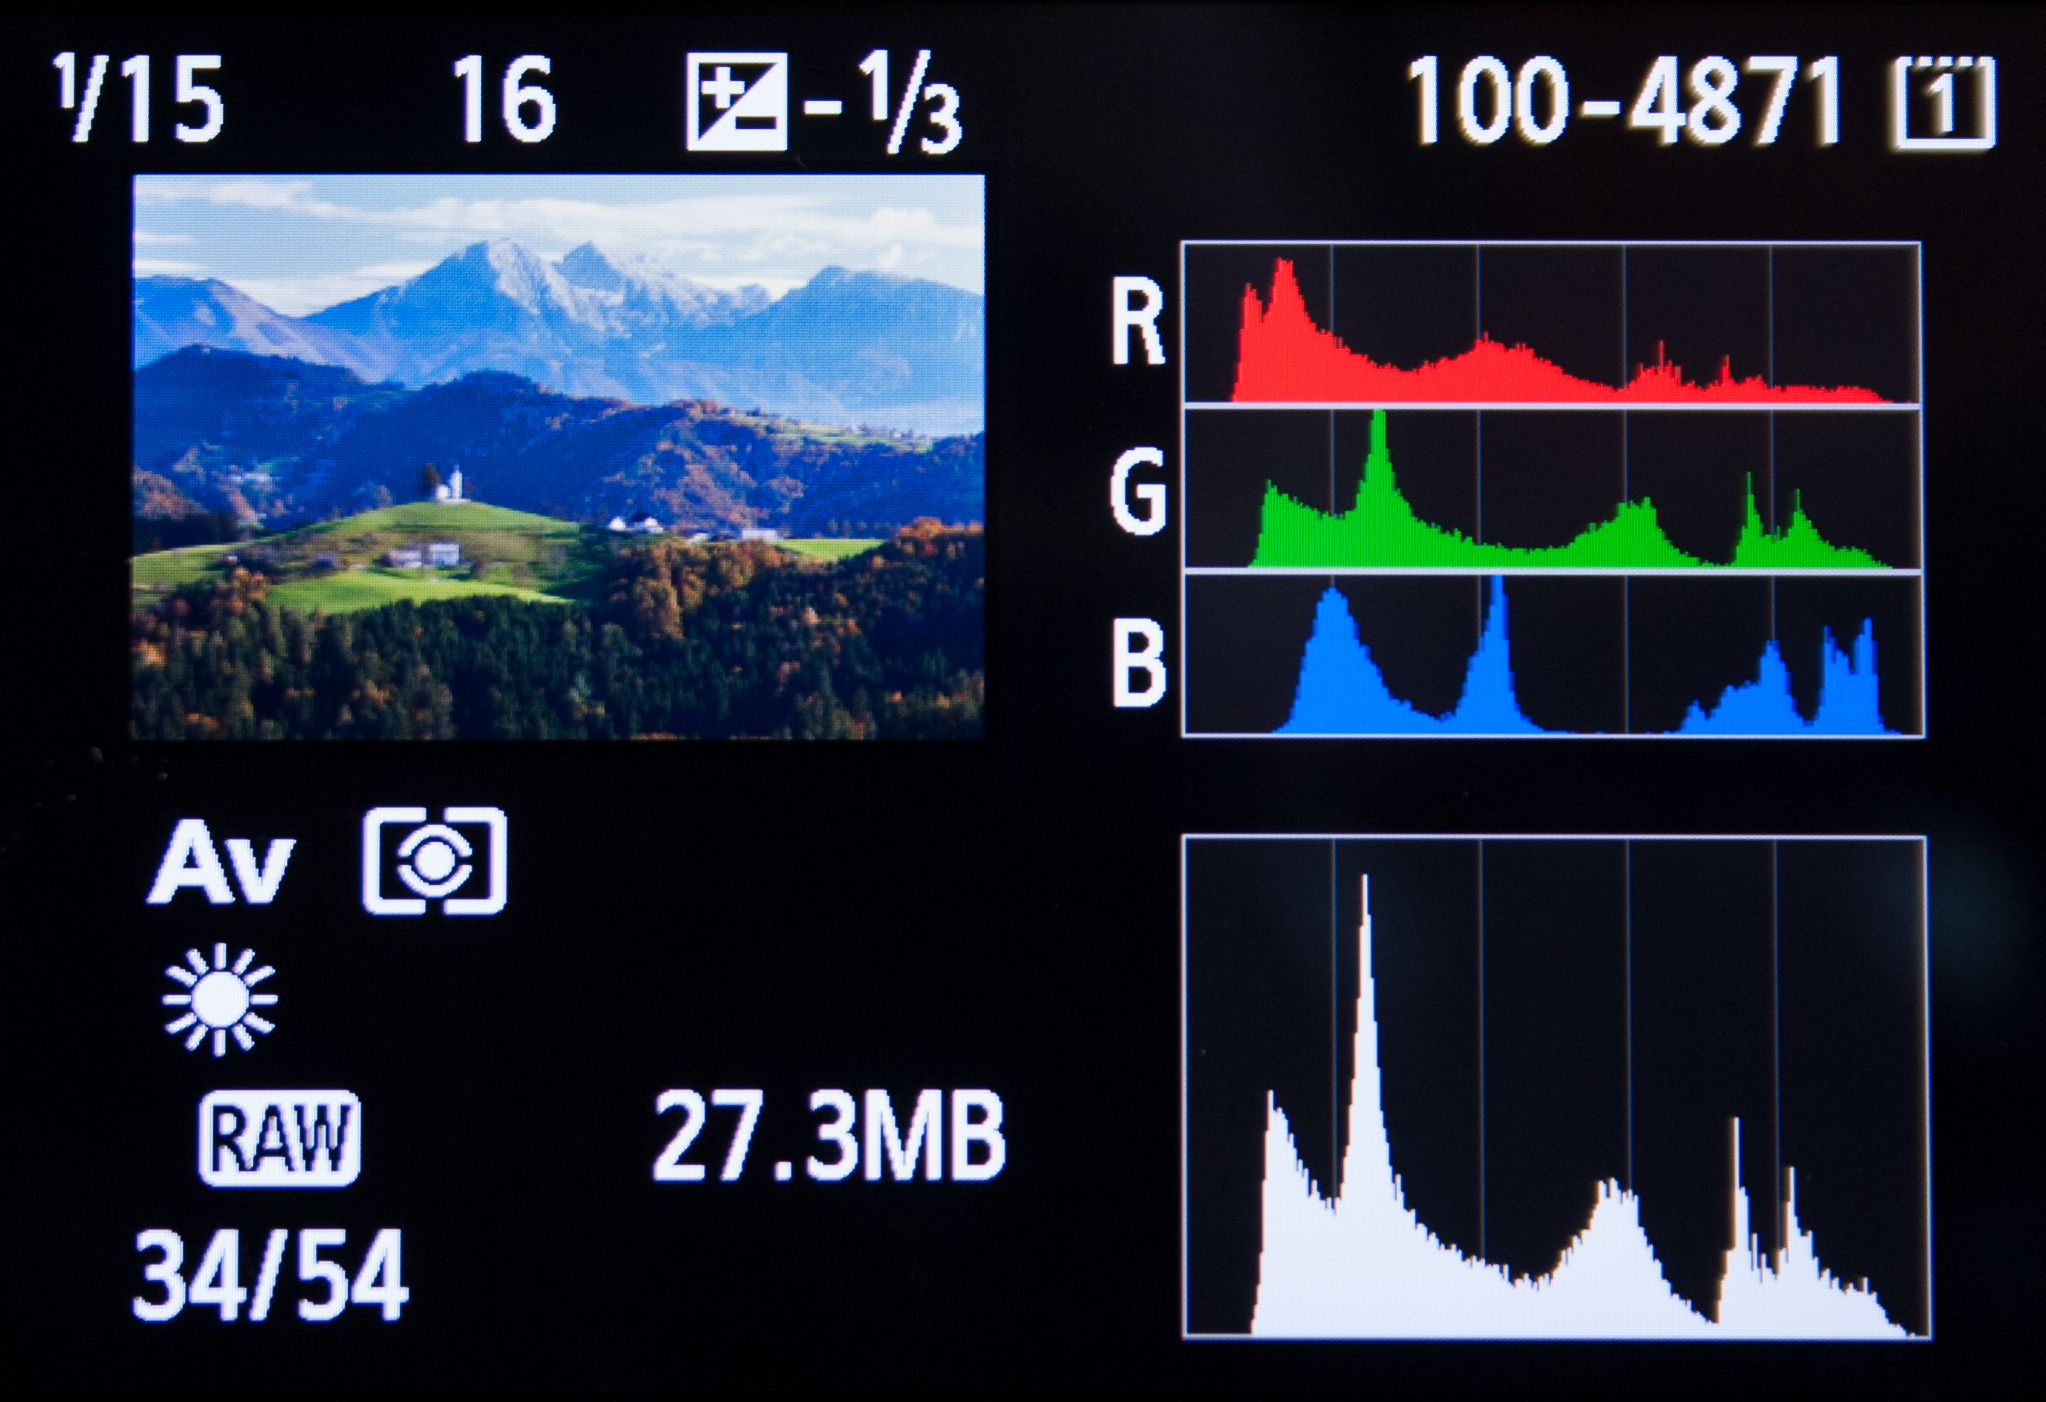
There are two options. As you can see on the photo above, you can view a breakdown of the three colour channels, red, green, blue (RGB) or the histogram as a whole. Or both, like in this case.
As we can see by this histogram the photo has a fairly even spread of tones across the range. There is a fair amount of shadow detail, representing the dark areas of the trees and the hills. The highlights on the right represent the sky and clouds. And in the midtone area there is also some detail.
It is also an indication that the photo has been well-exposed. Everything falls within the range of the graph, 0-255, and nothing is pushed too far to the left or the right. When this does happen, we have problems.
Clipping as shown on the histogram:
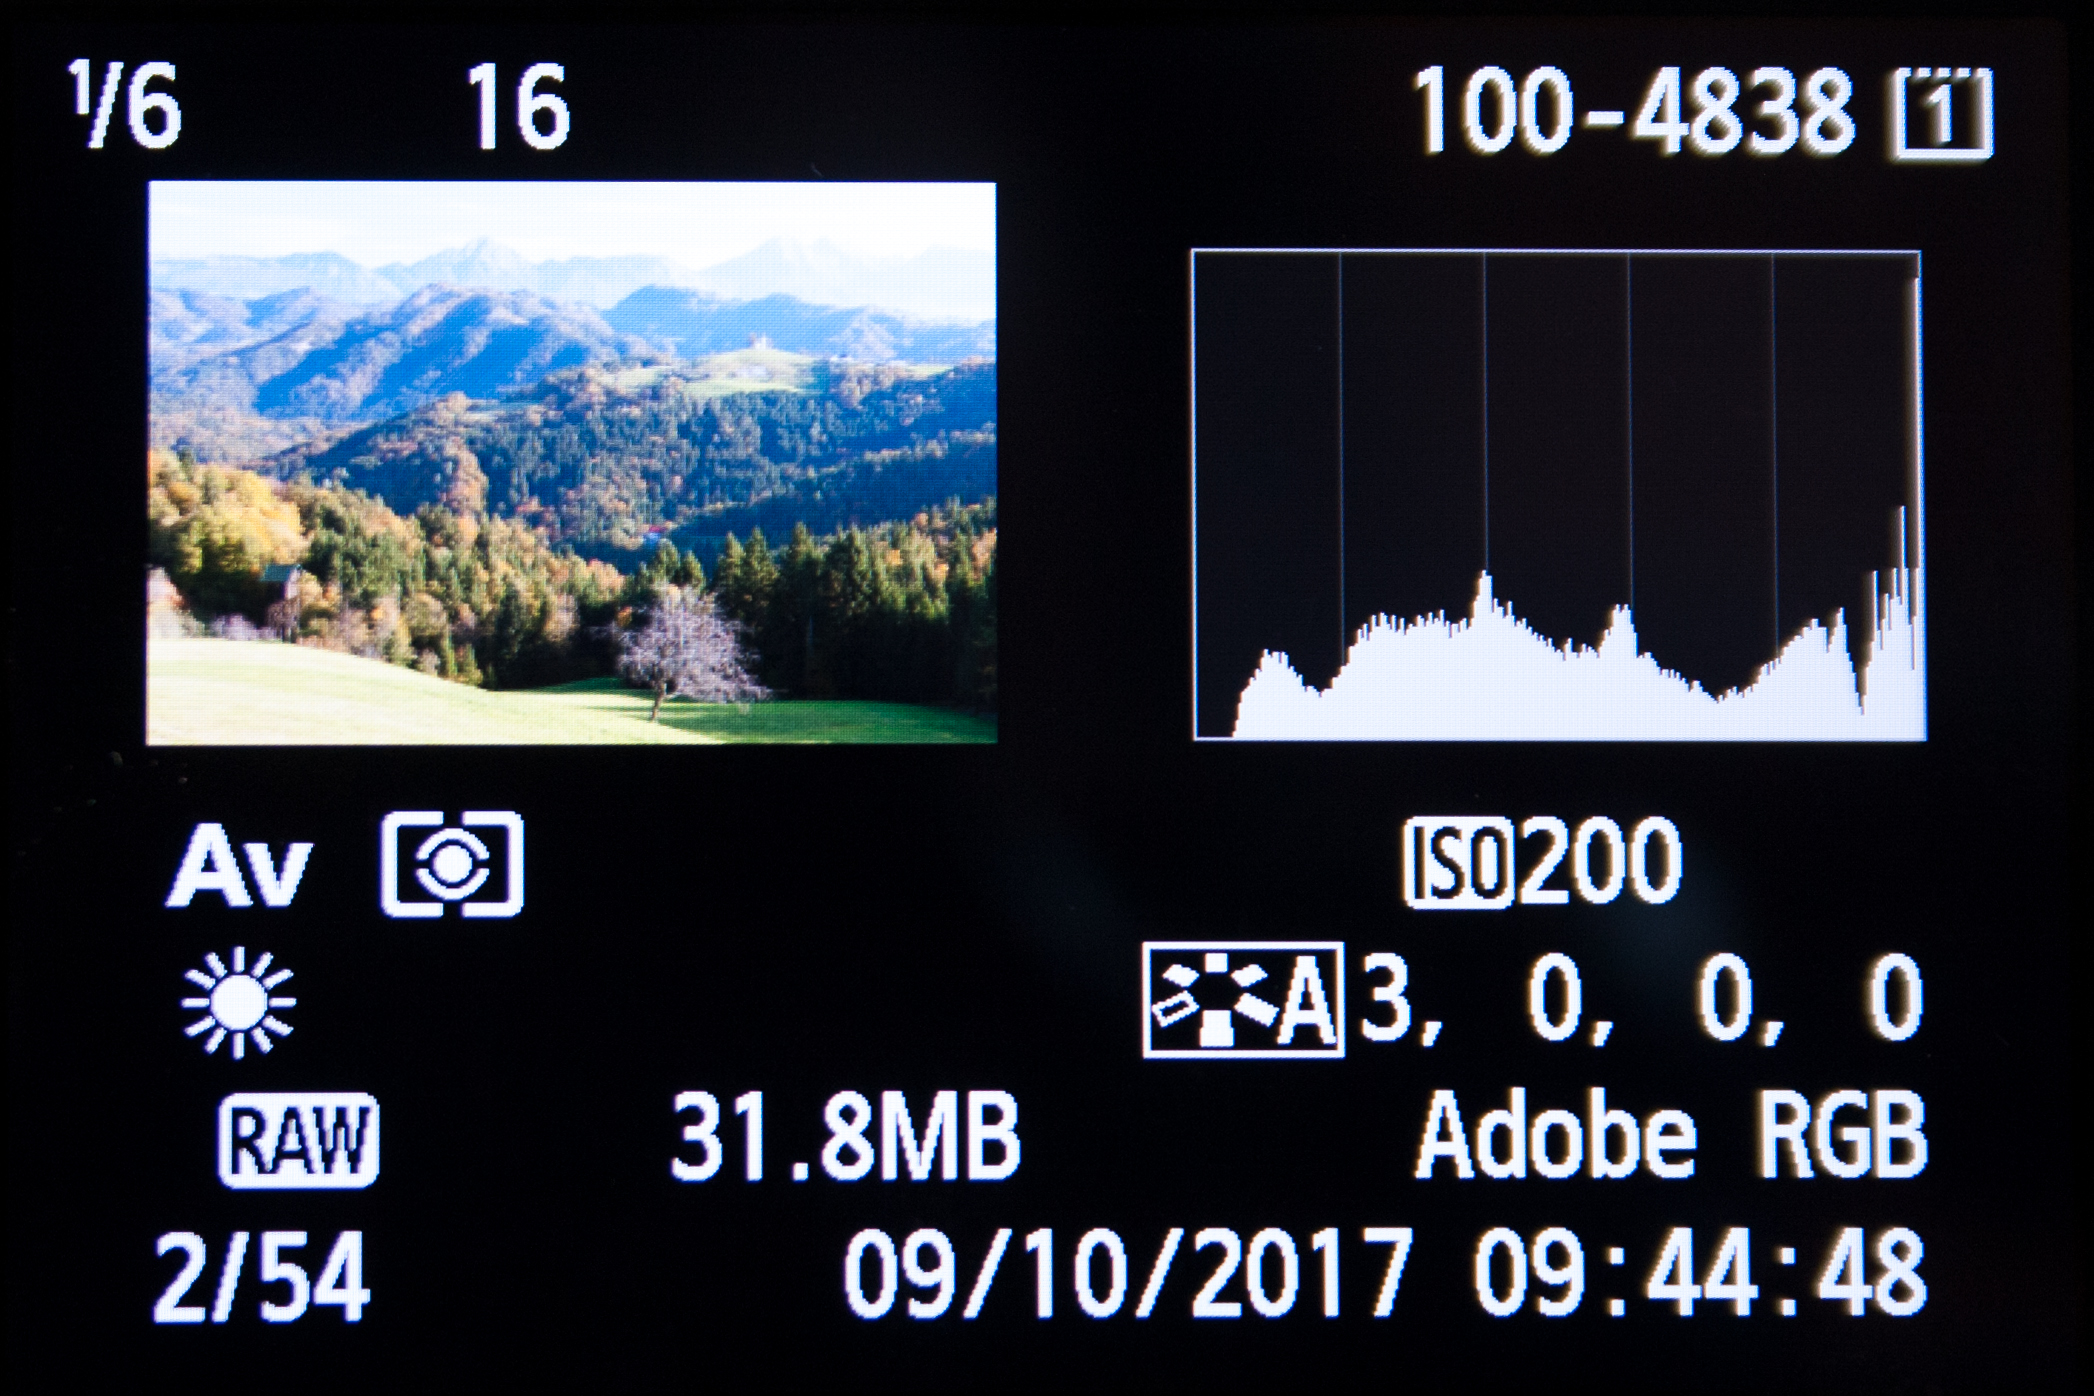
Notice that on the far right of the histogram for the photo here there is a spike which shows clipping of the highlights has occurred. This means that the image has some areas which are completely white with no details. This is known as clipping. Clipping has occurred because the sky is overexposed and the detail is blown out. The histogram is too far to the right and is off the scale.
Correctly exposed
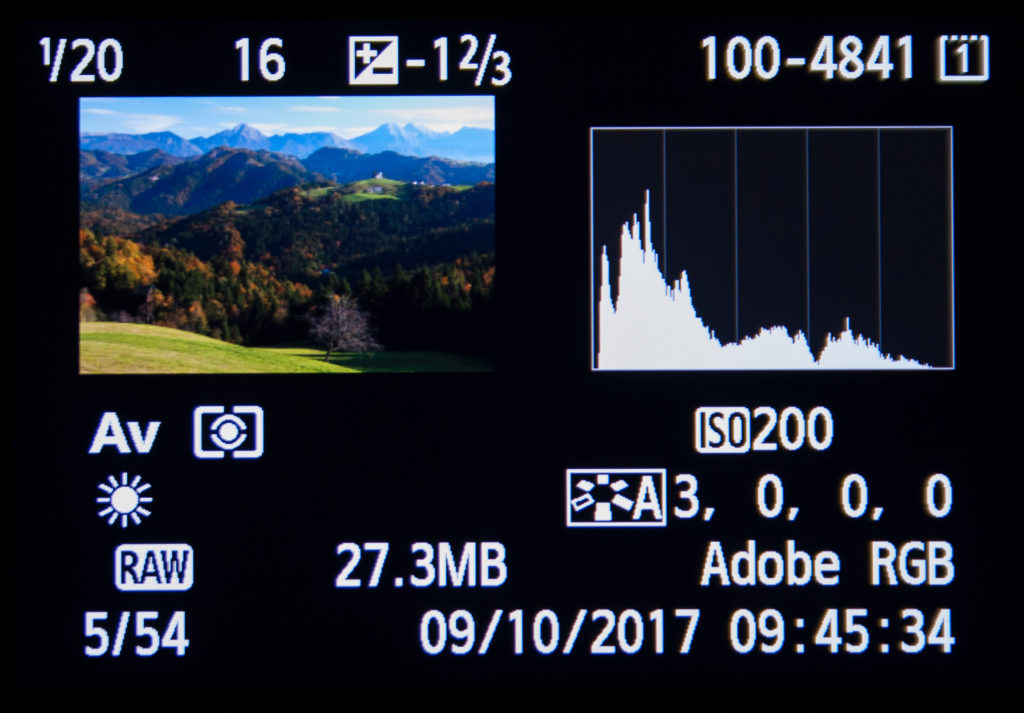
Here I increased the shutter speed and reduced the exposure time so that I didn’t overexpose the scene. Now you can see that the histogram is more to the left, as it should be. In this photo there is no clipping, neither on the left nor the right.
How to Avoid clipping when editing your photos
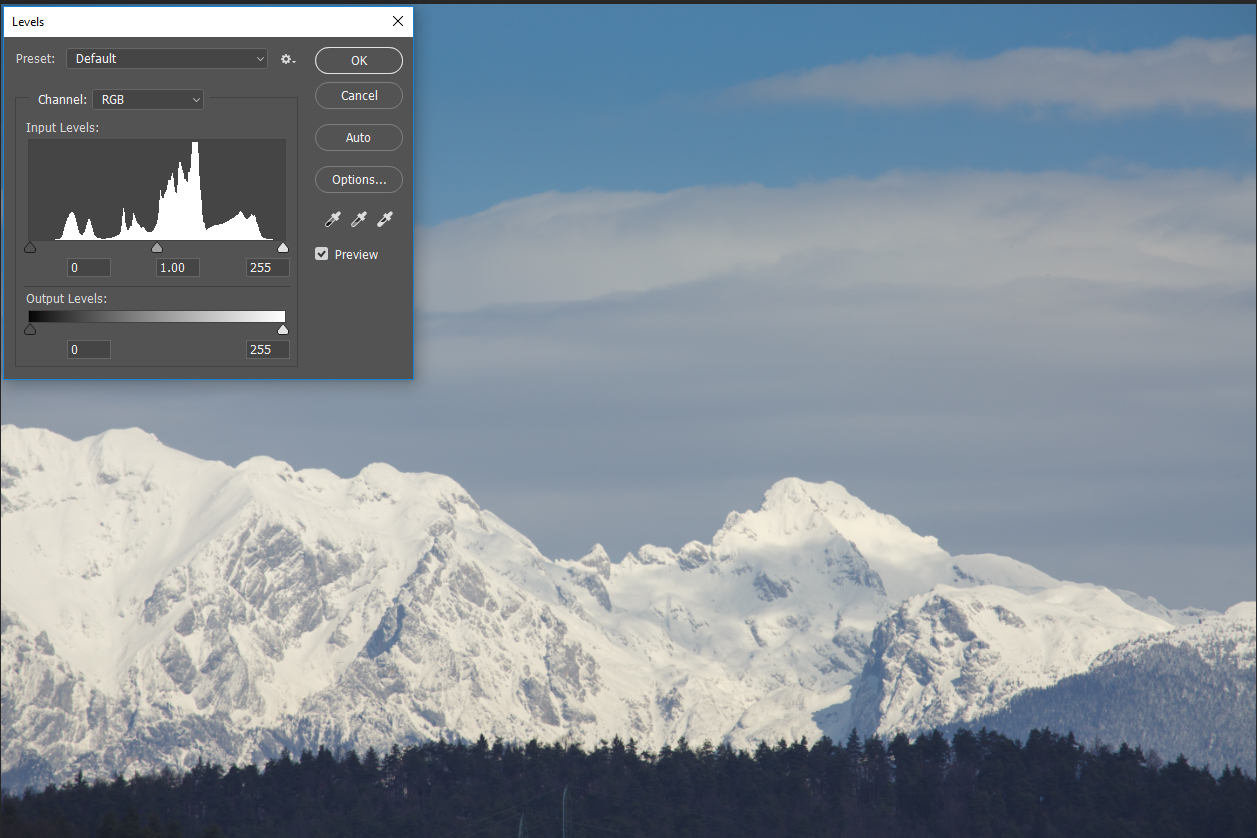
Sometimes the contrast of a scene is a little lower than the range of the camera. On the photo here the histogram has gaps on both the left and the right. This indicates that there is not enough contrast in the scene to fill the entire tonal range.
Adjusting the levels can help

You can adjust this in both Adobe Camera RAW and Adobe photoshop to spread the tones across the entire tonal range, which also has the effect of boosting the contrast, as you can see in the photo above. But you need to be careful that you don’t push it too far and clip your highlights or shadows.
Watch my Video tutorial
In this video I show you how to utilise the highlight and shadow clipping warning features in the histogram of both Adobe Camera RAW and Adobe Photoshop. It can also easily be done in Adobe Lightroom.
My book
Learn Photography
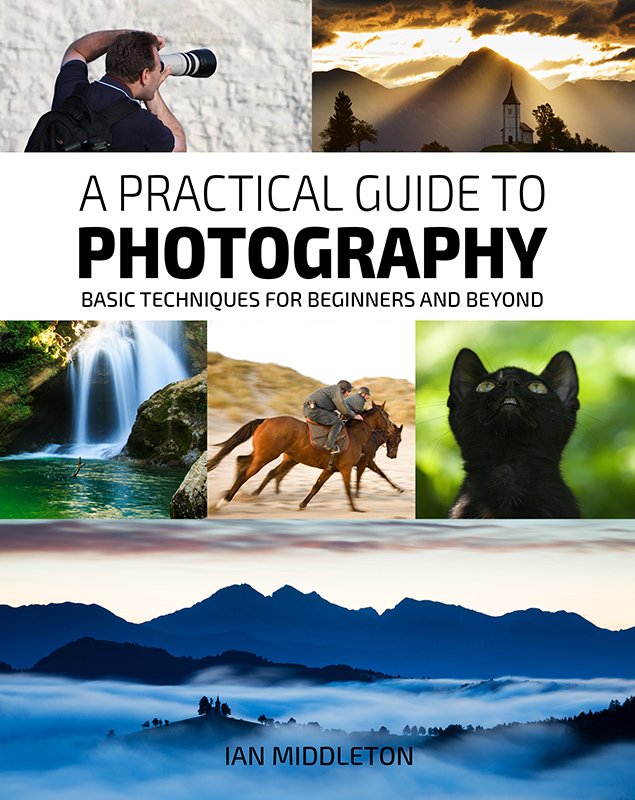
For a more comprehensive look at photography, check out my book, available to buy at Amazon.
Shedding light on all the photography basics in one book.
Want to know how to take better photos? Well, first you need to master the basic techniques. Whether you are a complete beginner or an intermediate looking to improve your photography, this book is packed with photography techniques, tips and advice for beginners and intermediates.
All the camera functions and their effects explained.

