Focus Stacking - How it is done
Have you ever wondered how you can extend your depth of field in an image beyond what the camera is capable of? Well there is a technique that photographers call focus stacking. It’s a simple process that involves you taking two identical photos, but each one focused on a different subject in your scene. It uses an editing technique similar to one that is used for exposure blending in order to overcome problems with dynamic range.
In the video at the bottom I show you a simple way to use layers and layer masks in the focus stacking technique.
Depth of field
But first, a quick overview of aperture and depth of field.
The camera’s aperture
Like our eye, the camera also has a method of increasing or restricting the amount of light that passes through its lens. Instead of a pupil, it has an aperture, a hole if you will. It works in a similar way to our iris and pupil. A mechanical iris works to set the size of the aperture hole. When you press the shutter to take your photo, the aperture blades close in to set the aperture just before the shutter is opened.
You can see this by pressing the depth of field preview button on your lens (if you have one)
Aperture sizes:
Aperture sizes are determined by f + number (also known as f-stop)
The higher the number, the smaller the aperture. See photo:
Aperture and focal length:
Although apertures come in f numbers, the actual dimension of the hole depends upon the focal length. You can calculate the dimension thus:
Focal length divided by F stop
Therefore the aperture of a 50mm lens at f/8 will be a circle with diameter of 50/8 = 6.25mm
The aperture of a 100mm lens at f/8 will be a circle with diameter of 100/8 = 12.5mm
Effect: - Depth of field
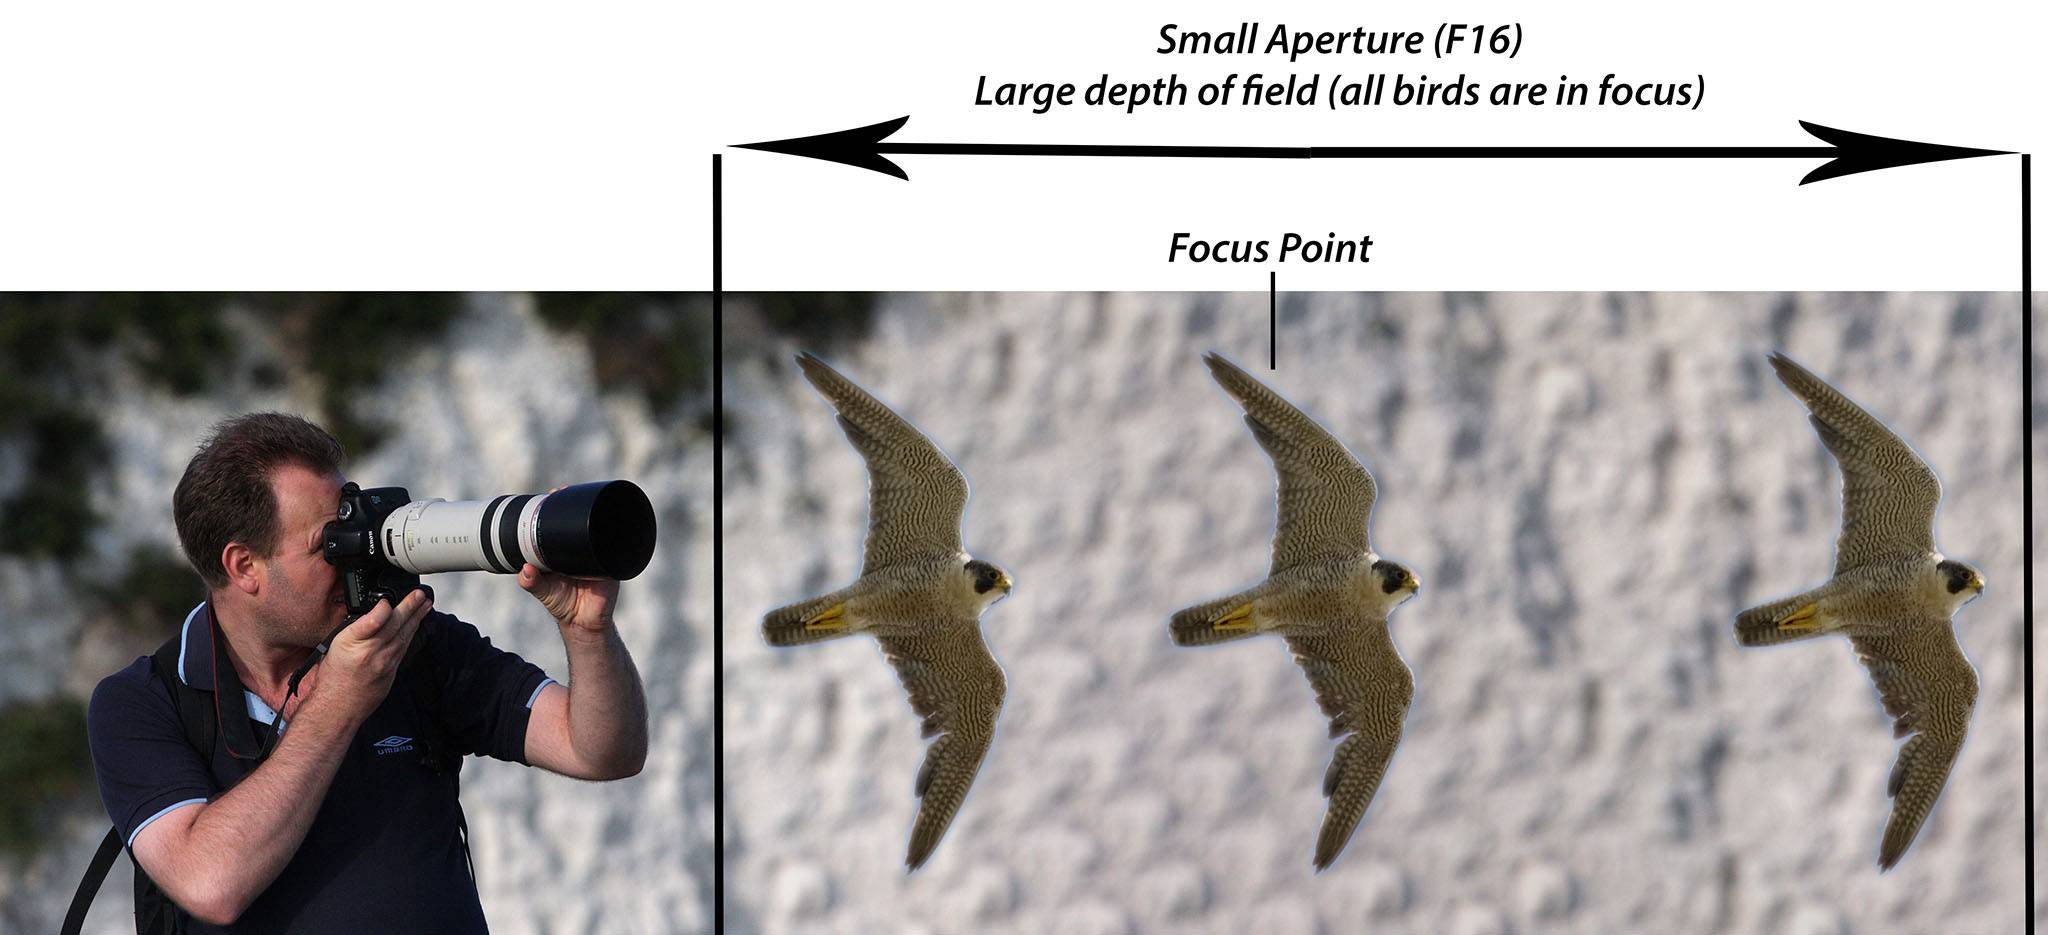
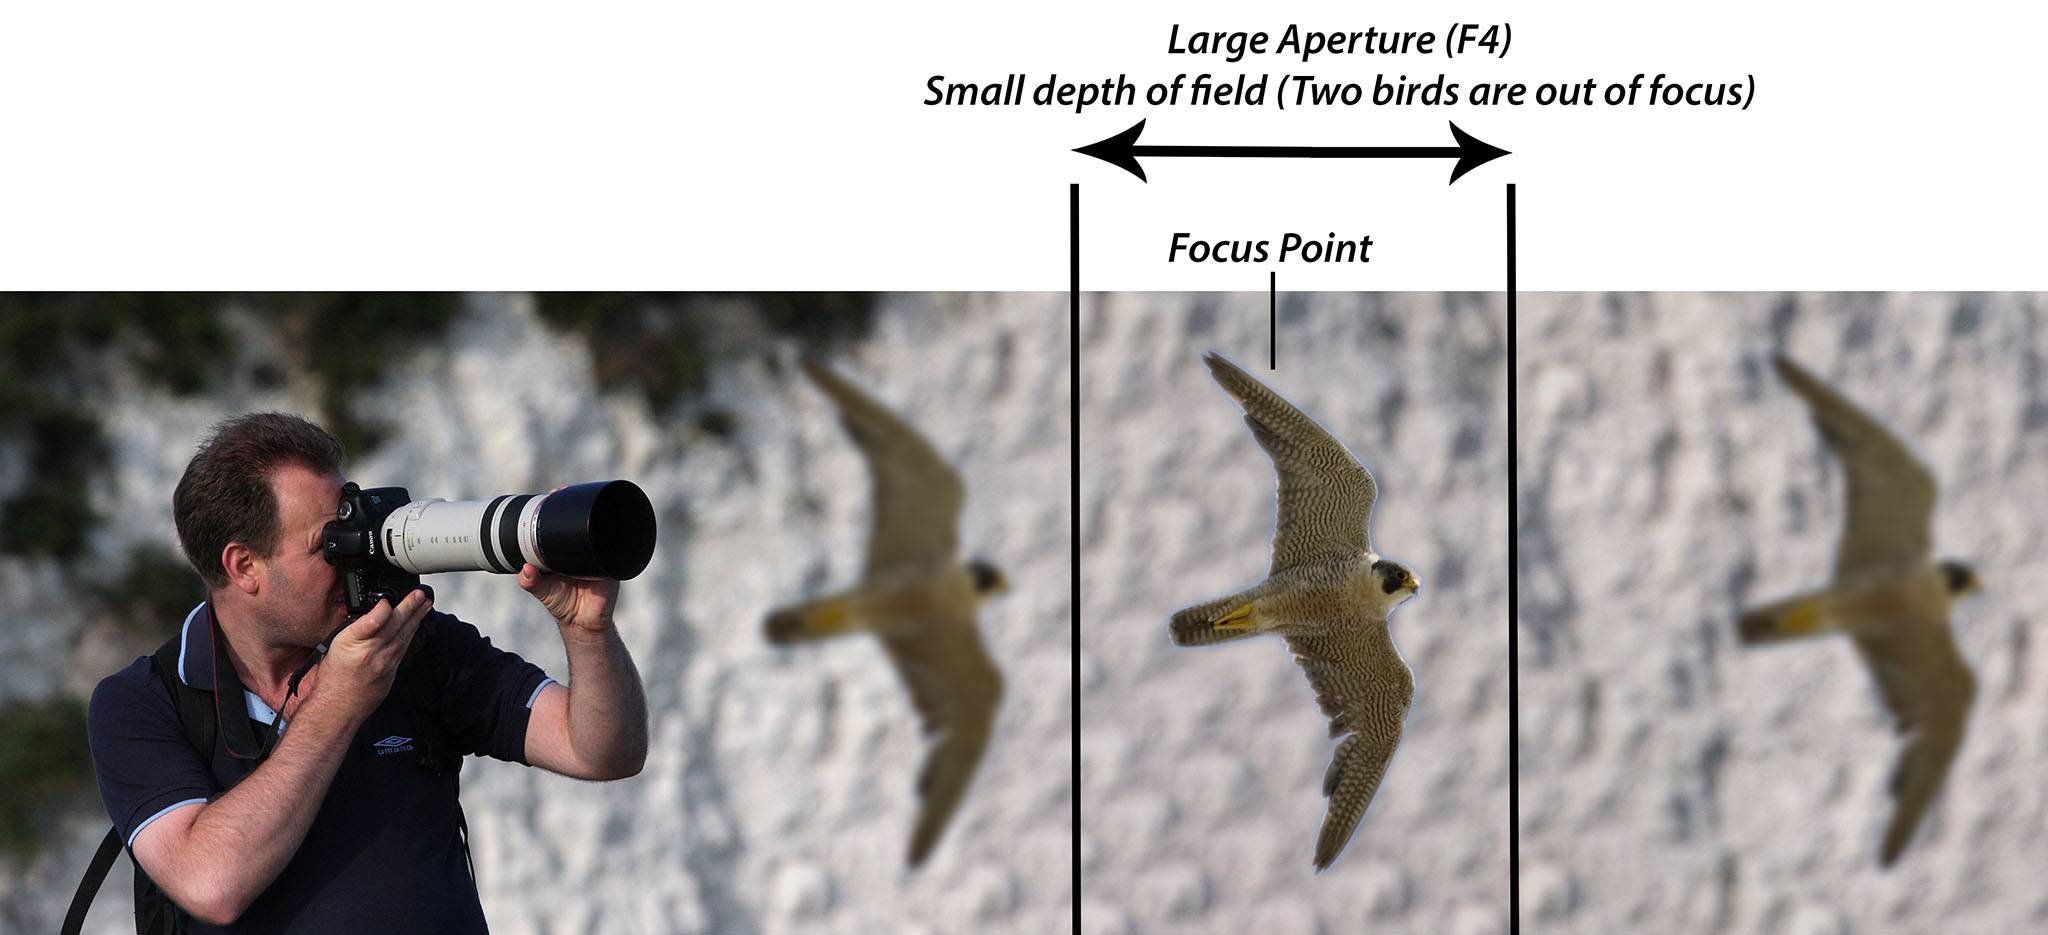
Depth of field is the distance in front of and behind your point of focus that will also be in focus. The aperture setting affects the depth of field as follows:
A smaller aperture (f16) will result in a larger depth of field, so more of the scene will be in focus (great for landscapes)
A large aperture (f4 will result in a small depth of field, so less of the scene will be in focus. (great for portraits)
Two other things affect depth of field
Focal length – longer focal lengths reduce the depth of field even more. This is because the longer the focal length, the larger the hole. So although the F number is the same, the hole is actually bigger. This means that the depth of field you get from an F16 at 50mm, is larger than an F16 at 200mm.
Distance from your point of focus – the closer you are to the point of focus, the more the depth of field is reduced. Conversely, the further away you are from the point of focus, the larger the depth of field.
Back to focus stacking
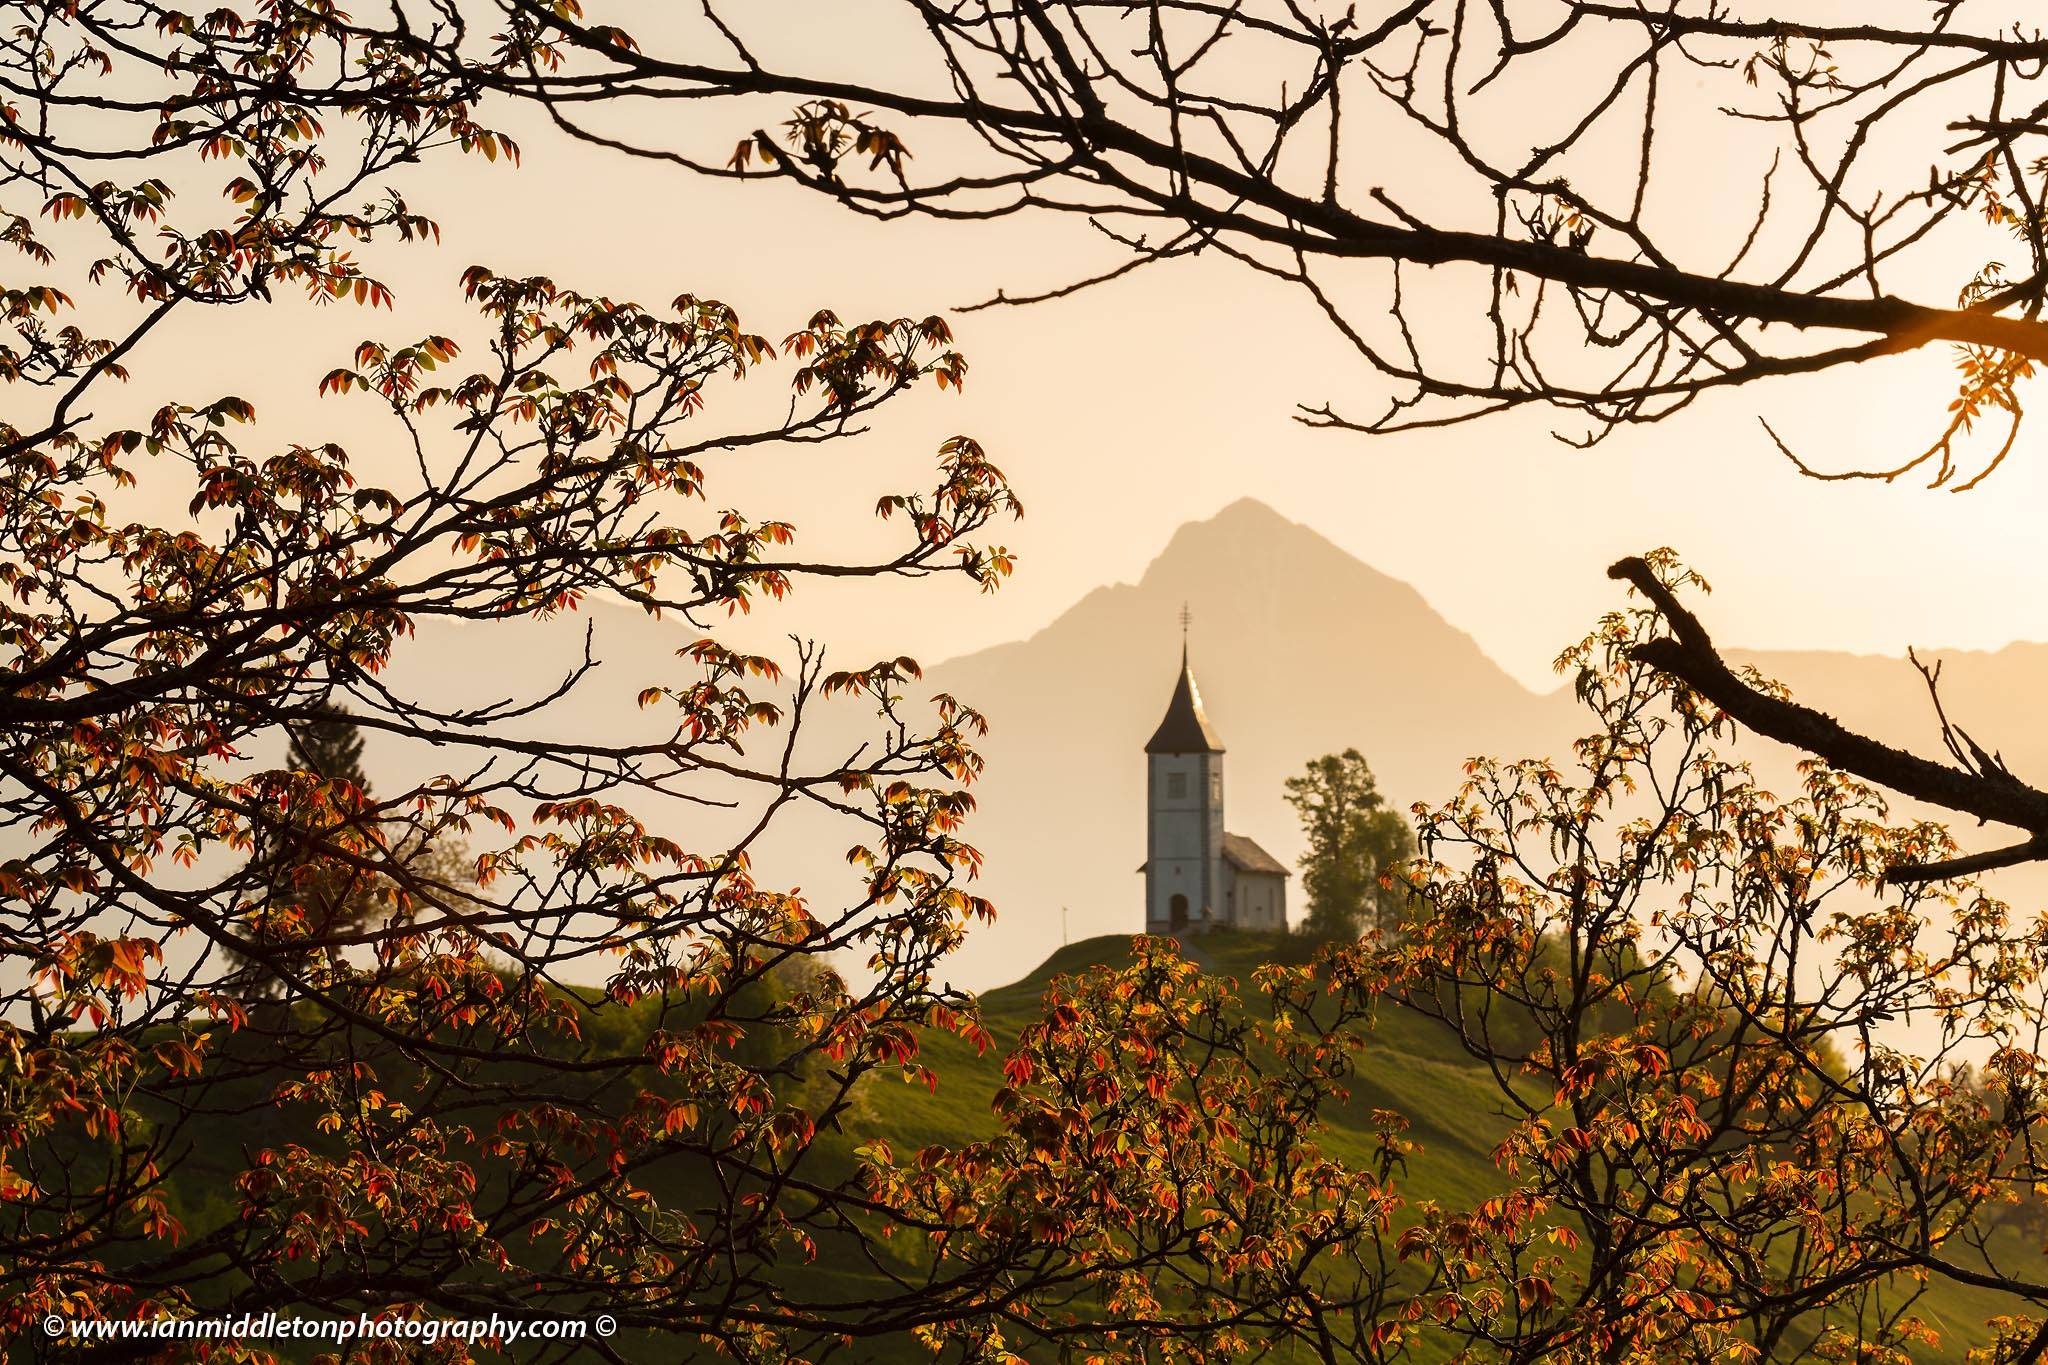
Sometimes it’s not possible to extend your depth of field far enough. In the photo below I was standing close to the trees, and I was also getting closer by using a 100mm focal length. I focused on the trees for the first photo. But although I set my aperture to F16, the depth of field was still too narrow and the church was too blurry.
Keeping the two photos identical
It’s very important to note here that when you do this, you must use a tripod and be very careful not to move anything. The two photos must be identical or else they won’t match up when you blend them.
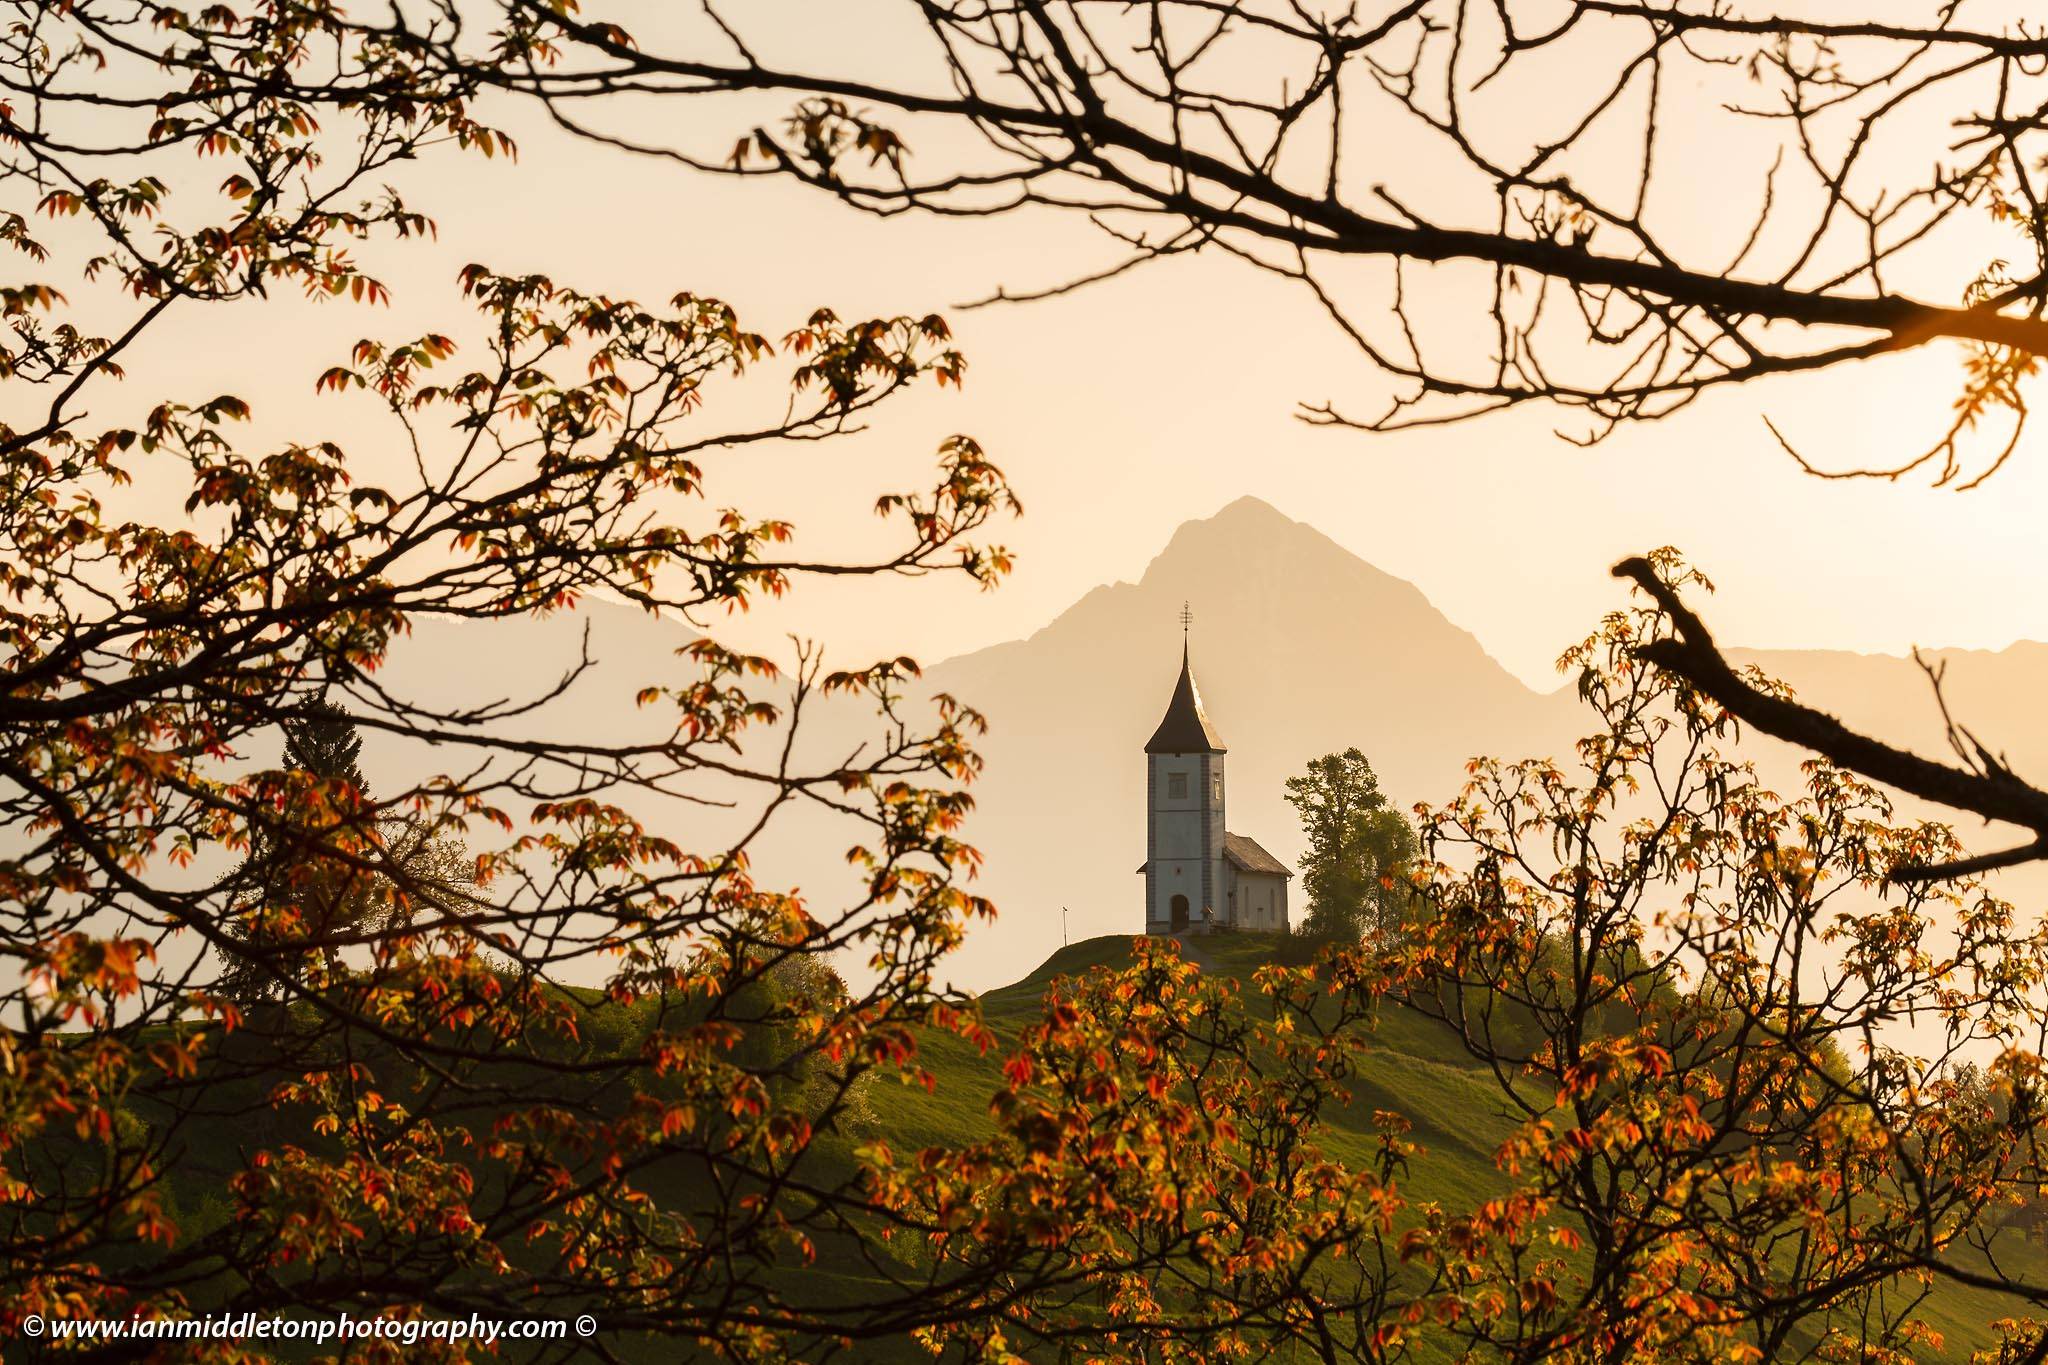
For the second photo I focused on the church and here you can see that the branches are now blurred but the church is sharp:
The result
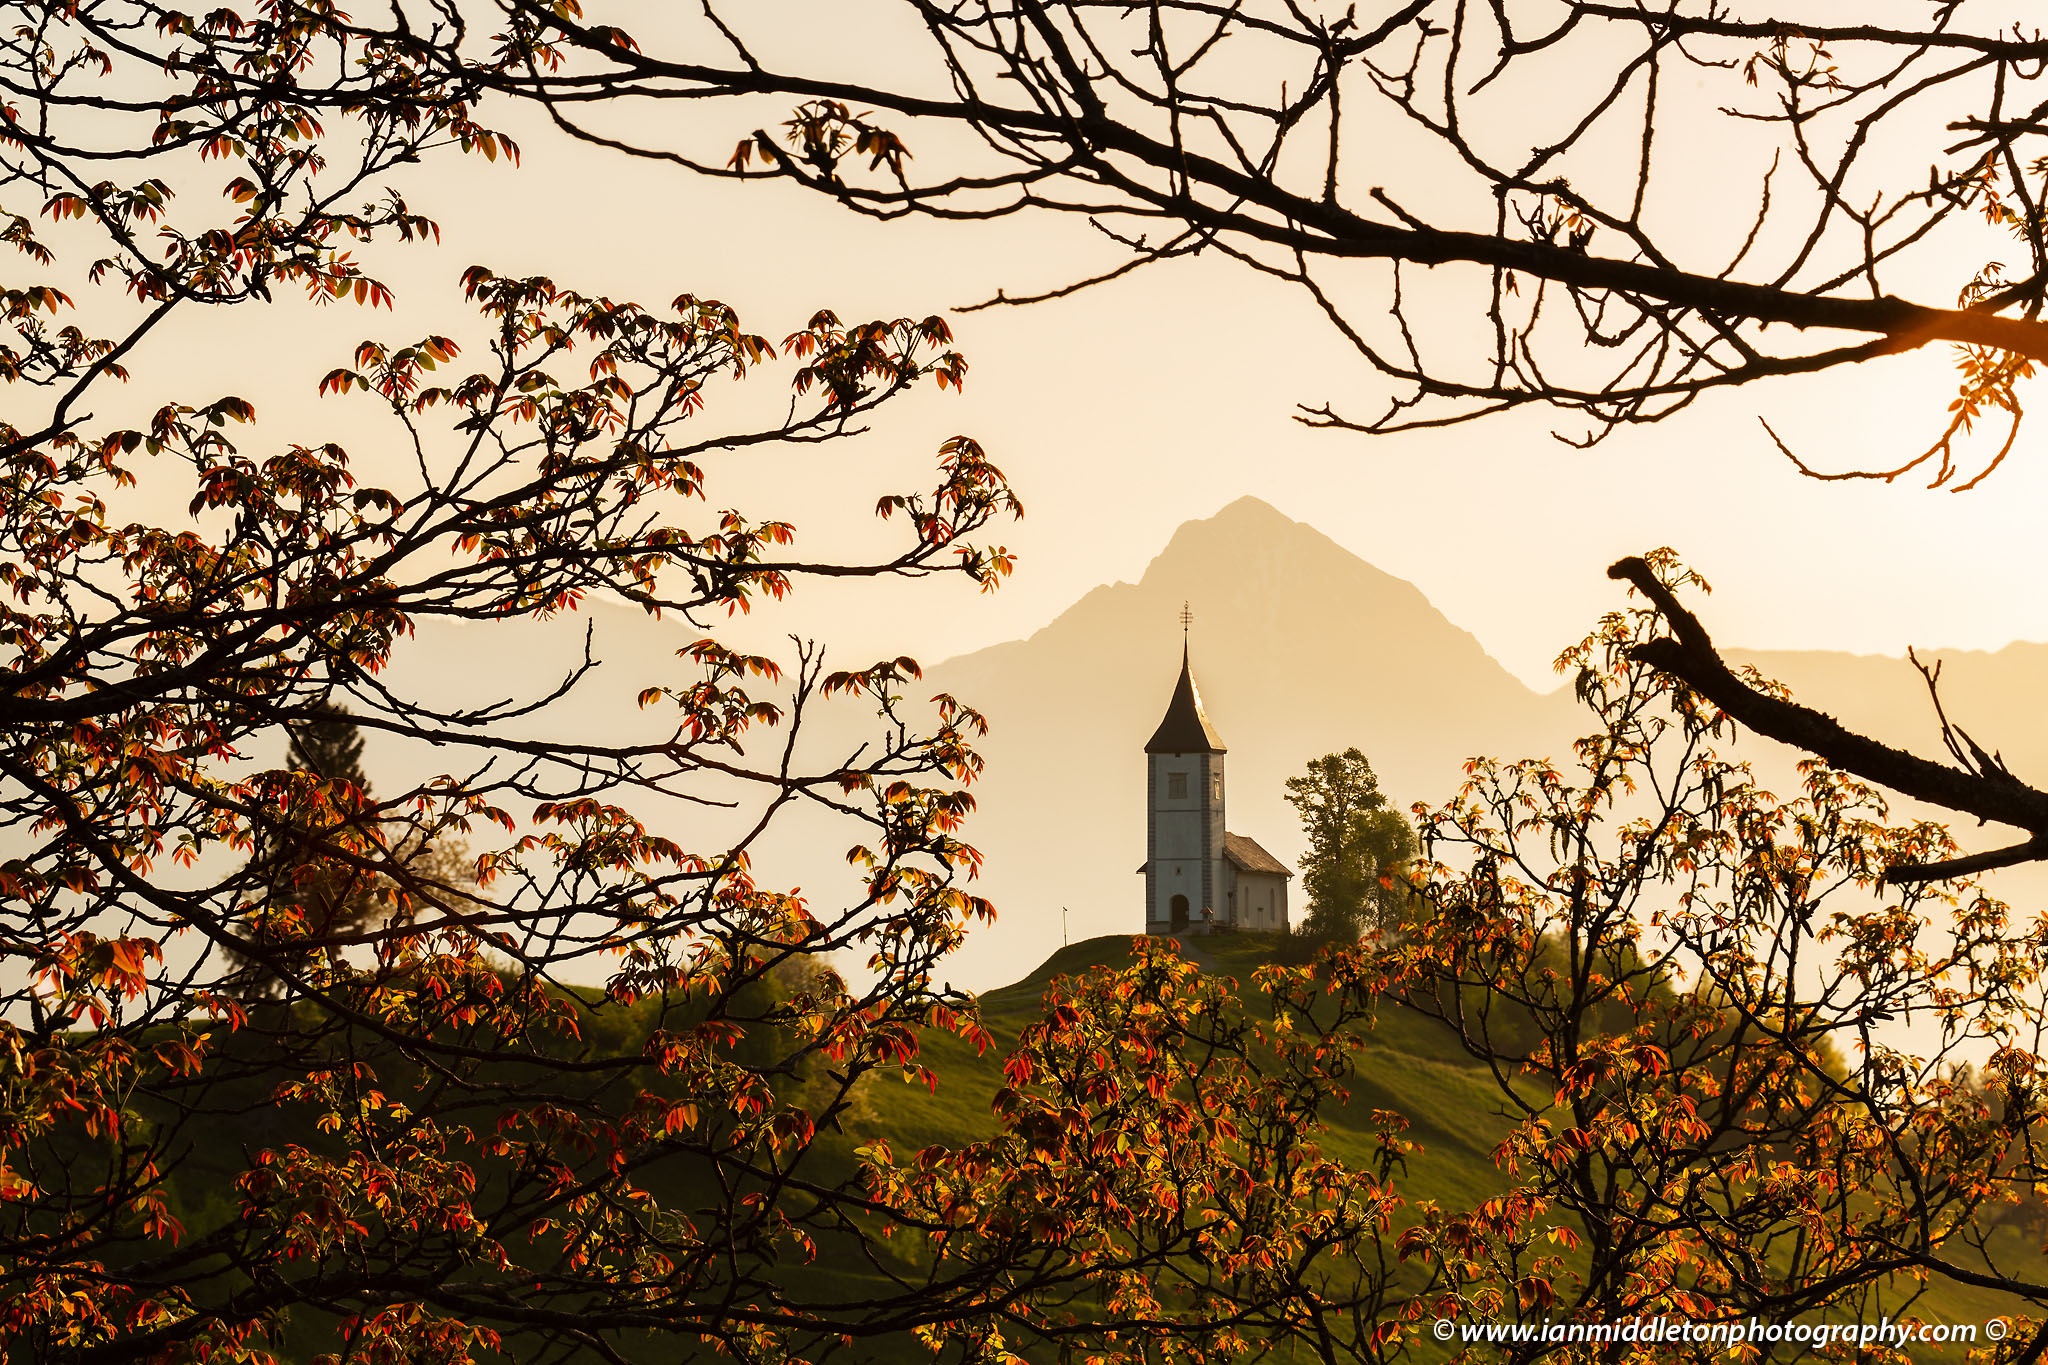
When the focus stacking technique is applied then both the trees and the church are perfectly sharp:
The video
So, sit back and relax and watch the video to see how it was done:
My book
Learn Photography
For a more comprehensive look at photography, check out my book, available to buy at Amazon.
Shedding light on all the photography basics in one book.
Want to know how to take better photos? Well, first you need to master the basic techniques. Whether you are a complete beginner or an intermediate looking to improve your photography, this book is packed with photography techniques, tips and advice for beginners and intermediates.
All the camera functions and their effects explained.


